

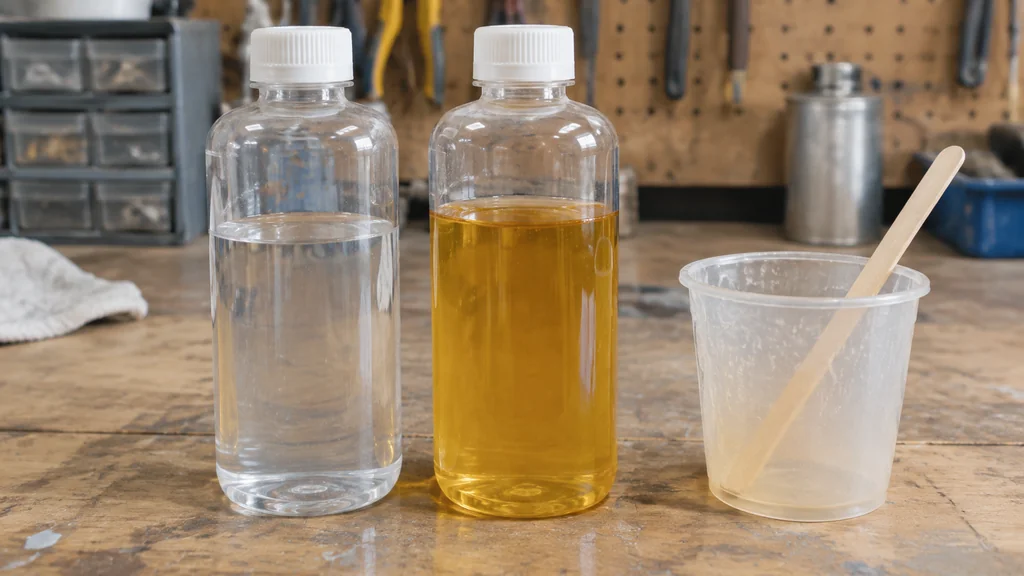
Casting epoxy and coating epoxy are two different products with two different jobs. Casting resin is formulated to be poured deep, in one thick block, and to cure clear without cracking or overheating. Coating resin, sometimes called a bar-top or table-top epoxy, is made to be spread thin over a surface, flow out flat and leave a hard, glossy film. Buy casting resin for moulds, embedded objects and thick pours. Buy coating resin for sealing a table top, a counter or a canvas. A coating resin poured deep traps heat and can scorch or crack, and a casting resin spread thin will not level into a flat film.
That is the whole decision in a paragraph. The rest of this article is about how to tell the two apart on the shelf, what each one costs you in time and money, and where beginners most often waste a pour.
The short answer for buyers
Match the resin to the pour thickness and the product’s stated use. Casting epoxy is built for volume. Coating epoxy is built for surface area. A deep mould needs a casting resin, and a flat table top needs a coating resin, and the labels usually say so in small print near the mix ratio.
The chemistry behind that difference is real. Epoxy cures by an exothermic reaction, meaning it gives off heat as it hardens. A thick mass of resin traps that heat in the middle, and if the product is not formulated for depth, the trapped heat accelerates the cure and can scorch or crack the piece. A coating resin spread thin sheds heat into the air and the substrate, so it can be formulated to flow and level instead. This is why the same brand will sell a casting line and a coating line side by side, and why the two should never be swapped.
For anyone sealing a table top for the first time, the coating side of that decision is covered in detail in this guide to an epoxy table for beginners, which walks through the seal coat, the flood coat and the sanding between them.
Table of Contents
- The short answer for buyers
- How to tell casting resin from coating resin on the shelf
- What casting epoxy is for, and what it costs you
- What coating epoxy is for, and where it fails
- Step by step: choosing and using the right one
- Cost, waste and the mistakes that cost the most
- When to call a pro or switch products
- Casting vs Coating Epoxy FAQ
How to tell casting resin from coating resin on the shelf
Read the label for four things before you pay. Maximum pour depth, mix ratio, working time and recommended use. Those four lines separate the products faster than any marketing copy.
Coating resins usually state a thin film, sometimes with a note that a second coat can follow. Check the spec sheet for the exact number, because it varies by brand.
- Mix ratio. Casting resins often use a 1:1 or 2:1 ratio by volume, while coating resins frequently use a different ratio by volume or by weight. A resin measured by weight and mixed by volume will never cure right, so read which one the label gives.
- Viscosity. Coating resin is thinner and flows out to a flat film. Casting resin is thicker so it holds shape in a mould and releases bubbles more slowly.
- Additives. Casting resins often carry UV stabilisers and anti-yellowing packages because clear cast pieces are display objects. Coating resins carry flow agents and surface modifiers so the film levels and resists scratches.
If the label does not state a pour depth, check the spec sheet or ask the seller before you pour.
What casting epoxy is for, and what it costs you
Casting resin is the right buy for anything where the resin is the object. Paperweights, coasters, embedded flowers, river tables with a deep channel, knife scales, dice and jewellery blanks. It is also the resin you want when you are pouring into a mould that has real depth, because the formulation is designed to release heat slowly enough that the block cures clear.
The trade-off is time and patience. Deep pours take longer to cure, and many casting resins require several layers. That schedule can occupy much of a working day.
Casting resin also punishes over-colouring. Go past that and you risk a soft, tacky or unevenly cured cast. If you are pouring deep moulds and want the specifics on layering and bubble control, the guide to clear casting resin for deep molds covers the sequence properly.
Temperature matters more with casting resin than most beginners expect. A cold garage in January will slow the cure and trap bubbles, and a hot shed in July will cut your working time.
On the industrial side, casting resins have a long history. Polyester Resin is another casting material, but it behaves differently during curing and has a stronger odour. That background explains why casting products are formulated for volume and structural use, while the craft market borrowed the chemistry later.
What coating epoxy is for, and where it fails
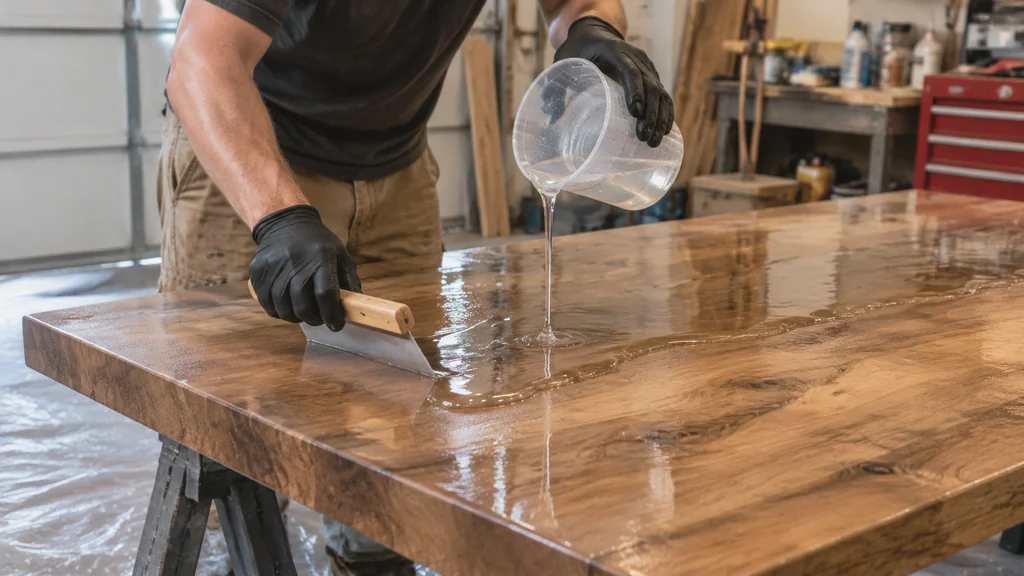
Coating resin is used for thin surface layers. It can be poured or brushed over a bar top, counter, table, painted canvas, decoupage panel or sign, where it flows out and self-levels into a film.
Its main limitation is depth. A coating resin should be kept within the pour depth stated on its label. A thick layer can trap heat from the curing reaction and may overheat or crack.
Temperature and timing also affect the result. ArtResin recommends using its resin between 75-85°F (24-30°C), gives it a working time of about 45 minutes after mixing, and states that it is dry to the touch after about 24 hours and fully cured in 72 hours. Fully cured ArtResin can handle temperatures up to 120°F (50°C) before softening.
Colourants should not exceed 6% of the total volume of mixed resin and hardener. For finish work, the notes on black epoxy resin pigments and finish cover pigment and finish considerations before you tint a coating pour.
ArtResin stays fresh for about 1 year unopened or around 6 months once opened. Layers should be left 3-5 hours until they reach the gel stage before the next layer is poured.
Step by step: choosing and using the right one
- Measure the deepest part of your pour. If the resin will sit thicker than the coating product allows, you need casting resin.
- Read the label for maximum pour depth, mix ratio and whether that ratio is by volume or by weight.
- Check the workspace temperature against the product’s recommended range before you open anything.
- Mix in a clean cup, scrape the sides and the bottom, and stir slowly to keep bubbles out.
- Pour casting resin in layers if the depth exceeds the stated limit, waiting for the gel stage between them.
- Spread coating resin thin with a spreader, then pass a heat gun or torch quickly over the surface to pop bubbles.
- Leave the piece covered and dust-free for the full cure time, not just until it is dry to the touch.
ArtResin gives a useful benchmark for that last point. Their resin is dry to the touch after about 24 hours and fully cured in 72 hours.
Cost, waste and the mistakes that cost the most
The cheapest resin is the one that cures correctly the first time. A failed deep pour of coating resin wastes the entire bottle, the mould, the embedded objects and an evening. Buying the correct casting resin for that job costs less than the failure.
Three mistakes account for most of the waste I see.
- Buying one resin for both jobs. It does not work. Keep a coating resin for surfaces and a casting resin for moulds, and label the bottles with a marker so you do not mix them up at midnight.
- Over-pigmenting. The 6% colourant ceiling from ArtResin is a real limit. More pigment does not mean a deeper colour, it means a softer cure.
- Pouring cold. Below the recommended range, bubbles rise too slowly to escape and the cure drags out. Above it, the working time collapses.
The market context is worth knowing if you are comparing prices. The same base chemistry appears under many labels at very different prices.
For comparison, Polyester Resin behaves differently again. Polyester also carries a strong odour during curing, which is one reason craft work leans on Epoxy Resin instead. UV stabilisers and anti-yellowing packages are also common considerations for clear cast pieces.
Curing temperature also separates the industrial grades from the craft bottles. Do not read an industrial datasheet and assume your two-part craft kit behaves the same way. Check the label on the bottle in your hand.

When to call a pro or switch products
Call in a professional for large structural pours, commercial bar tops and any floor coating. The surface prep, moisture testing and mixing equipment are beyond a home setup, and a failed commercial floor is a serious bill.
Switch products rather than fight the one you have in these cases.
- The pour is deeper than the label allows. Buy a casting resin rated for that depth.
- The surface is large and flat. Buy a coating resin and stop trying to brush a casting resin thin.
- The piece will take heat. Check the cured heat tolerance, and if it is close to the limit, choose another material.
- The resin is old or has been open for months. Buy fresh, because shelf life is real.
One more practical note. Casting resins often carry UV stabilisers and anti-yellowing packages, as covered in the label section above. If the piece will sit in a sunny window, check the additive list before you buy.
Casting vs Coating Epoxy FAQ
Can I use casting resin as a coating?
No, not successfully. Casting resin is thicker and formulated for depth, so brushed thin it tends to stay tacky, trap bubbles and refuse to level into a flat film. Buy a coating resin for surfaces.
Can I pour coating resin thick?
Only up to the depth the label states, which is usually thin. Coating resin poured deep traps its own heat, overheats and cracks. For a deep block, use a casting resin rated for that depth.
How long before I can pour a second layer?
With ArtResin, let the first layer sit 3-5 hours until it reaches a gel-like stage before pouring the next. Pouring onto a fully cured layer means sanding and cleaning first so the layers bond.
How much colourant can I add?
ArtResin states that colourants should not exceed 6% of the total volume of mixed resin and hardener. More than that risks a soft or unevenly cured cast.
How long does the resin keep on the shelf?
Store it sealed, upright and at room temperature, and buy for the job and avoid stockpiling.

Martin Flood
Martin Flood has been working in the construction industry for over 20 years as a general contractor with expertise in remodeling projects that are large or small. He has furthered his career by specializing in epoxy resin flooring, providing excellent service to both commercial and residential clients. Martin’s experience enables him to offer professional advice on how to choose the right type of project based on your needs and budget.
View all posts by Martin Flood →