

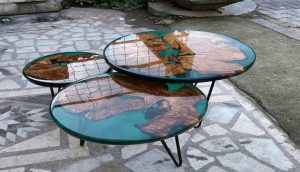
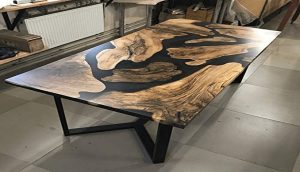
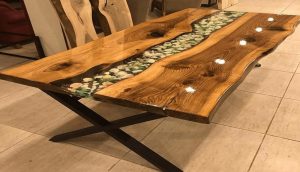
Epoxy provides a smooth, protective finish to tables. Used in place of more traditional veneers and varnishes, epoxy not only protects the surface from scratches and moisture but also can be sculpted into an entirely new table shape.
Epoxy is available in both clear and tinted versions as well as various levels of thickness depending on the desired end result. Apply epoxy to a table with care to ensure that it adheres properly and cures correctly.
Preparing the Table
1 Sand the table with 180-grit sandpaper until all rough patches are removed. Wipe away dust with a tack cloth or vacuum it up using the brush attachment on the vacuum cleaner.
2 Insert a large piece of newspaper under each side of the tabletop so that it hangs down below the edges by several inches on all sides.
Place painter’s tape over any decorative elements you do not wish epoxied such as carved floral designs or chiseled letters.
How do you apply clear epoxy to a table?
So, we applied our epoxy to the table in two coats. We waited 24 hours between each coat and allowed 72 hours for everything to dry before we could use it. We finished up with a nice shine and were ready for a good meal!
Table of Contents
- How do you apply clear epoxy to a table?
- How do you apply epoxy clear coat to wood?
- How do you apply a super clear epoxy top table?
- How do you seal a table with epoxy?
- How do you finish a clear epoxy resin table?
- Should you seal wood before epoxy?
- Do you need to clear coat epoxy?
- How long does it take for super clear table top epoxy to cure?
How do you apply epoxy clear coat to wood?

If you have the patience and are willing to spend the time, applying epoxy with a paint roller is a great way to get a very smooth surface on your countertop or table.
How do you apply a super clear epoxy top table?
The first step is to mix the epoxy and hardener thoroughly. You want to mix them for about five minutes so that you get a thorough blend of the two substances that don’t separate from each other as you are using them.
Next, pour it out on your table in one big blob. Then, use your roller to spread it out uniformly over the surface of the table.
You can even drag your spreader through it back and forth a few times until you get it nice and even across the top of the table.
Once it’s spread evenly, use your heat gun or torch to remove any air bubbles that may have formed under the surface of the epoxy.
Then, let it dry naturally for at least 48 hours so that all of its chemical processes can finish up while in contact with oxygen before you put anything on top of it or put anyone near it who might be harmed by some of its lesser-known properties.
How do you seal a table with epoxy?
You’ll first need to apply a thin coat of epoxy on the table surface, then let it dry. It is important that you apply the epoxy on one entire table, rather than applying a few coats here and there.
That’s because uneven coverage can lead to bubbles or wrinkles in later coats of epoxy, which will ruin your table’s look.
If you’re feeling especially lazy or in a hurry, you can use epoxy paint for a quick fix. Even though it has the same properties as clear epoxy resin, this product is typically easier to apply because it has less curing time (meaning it takes longer for it to harden).
How do you finish a clear epoxy resin table?
First, you’ll want to pour a thin layer of epoxy over your table, using a regular paint roller. This is necessary for two reasons: One, you don’t want your project to take forever.
Two, if you apply too much epoxy at once and it drips off the sides of the table without curing, it will be impossible to remove without damaging the wood underneath.
Some people recommend using a hairdryer or other heating source to cure the first layer faster; I found that this didn’t work as well as traditional methods like baking soda or sanding with steel wool.
The heat gun I used was not hot enough to fully cure the epoxy in one go, so I ended up having to repeat the process several times before getting it right (I also had trouble getting rid of bubbles).
Then use either a torch or acetone (nail polish remover) on top of those spots where you see bubbling happening again for another layer (I found Torches worked better than Acetone).
Should you seal wood before epoxy?
Seems like a weird question, right? Preparing wood for epoxy involves sealing the wood so that epoxy doesn’t soak into the wood and yellow over time. Since you want to seal your wood anyway, it seems weird to ask if you need to seal…right?
If you’re using anything but basic epoxy (resin and hardener), then no, you don’t have to seal your wood. Deep pour epoxies are formulated with properties that keep them from soaking in too far.
This means that they won’t yellow over time and will give a clear finish on the surface of your table. We recommend TotalBoat or System Three as deep pours because they have great clarity and work well for clear coating tables.
Do you need to clear coat epoxy?
Yes, you’ll want a clear coat on your epoxy table. Here’s why:
Epoxy is not a stand-alone protective coating. It will eventually degrade if exposed to the elements. So yes, you can use the clear coat for looks, but it also provides an extra layer of protection for your epoxy table.
If you have an outdoor table and plan on leaving it exposed to the elements through all seasons, we recommend using multiple layers of clear coat (three or more) to ensure that it has enough protection to weather rain and sunlight throughout the year. For indoor tables, two layers of clear coat should be sufficient.
How long does it take for super clear table top epoxy to cure?
The amount of time it takes for super clear tabletop epoxy to cure depends on several factors: the ambient temperature, the working time before you pour it, and the surface area of the piece.
Since epoxy is a thermoset plastic, it cures as a result of a chemical reaction that occurs as its molecules cross-link with each other.
This process begins when you mix equal parts resin and hardener. The curing reaction produces heat, so a warmer day will speed up the curing process slightly.
To avoid damaging your project’s surface with an unnecessary amount of thickened epoxy, your best bet is to follow our instructions in order to get an accurate estimate.
While clear coat epoxies are self-leveling, there is still some thickness involved in their curing process that can vary based on how much was poured at once and how wide a surface area was covered.
For example: if you were covering a square foot tabletop using our 1/2 gallon kit (which covers 24 square feet), your 1/8″ thick layer would cure faster than if you had poured all 24 square feet at once forming a 1/8″ thick layer across the whole thing!
Conclusion
You have learned how to apply a coat of epoxy to a table, whether that be an old, found piece of furniture or a new build.
You have been able to fill in the cracks and holes in your wood.
To continue this project on your own, you may want to add more coats of epoxy. You can get a deeper pour by using multiple layers.
You can also use many different colors for each layer and create some really cool, eye-catching designs.
If you were going to do this again, you may change out the sanding paper for higher grits so that the surface is perfectly smooth before the epoxy was poured on. This will ensure that there are no air bubbles left in the final product and would give it that professional look!
Martin Flood
Martin Flood has been working in the construction industry for over 20 years as a general contractor with expertise in remodeling projects that are large or small. He has furthered his career by specializing in epoxy resin flooring, providing excellent service to both commercial and residential clients. Martin’s experience enables him to offer professional advice on how to choose the right type of project based on your needs and budget.
View all posts by Martin Flood →