
If you’re new to woodworking or crafting, attaching resin to wood may seem like a daunting task. Whether you’re making furniture, art, or jewelry, the process of attaching resin to wood is an important step in your project. In order to attach resin to wood without ruining your project, preparation and care are key.
Resin is a liquid plastic that hardens when it comes into contact with air—the result is a clear hardened surface that’s often used for pieces of art and furniture.
Wood can be used for a variety of purposes in crafting and DIY projects. Both resin and wood are also commonly used together in projects—resin will give the finished product a glass-like finish while protecting the underlying wooden structure from harm.
Can you put resin over wood?
You can apply resin over wood. Before applying your resin, though, you might want to make sure the wood surface is clean and free of dust and dirt. You can also sand down the wood to roughen it up. This will make it easier for the resin to grab on.
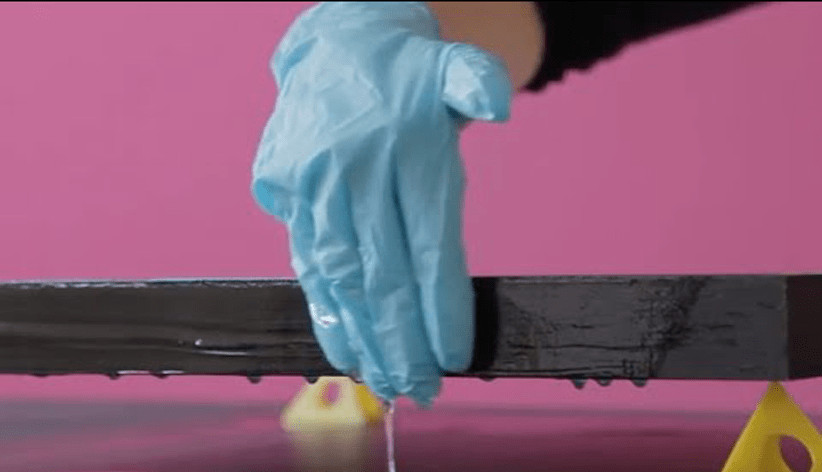
To apply resin over a wood surface, use a brush or roller. Make sure to work in thin layers so that you don’t create bubbles or pockets in the resin during application. Once you’re done applying your resin, wait for it to dry before proceeding with any other steps in your project!
Table of Contents
How do you bond epoxy to wood?
There are a few things you need to keep in mind when bonding epoxy to wood. First off, the wood should be smooth, clean, and dry before applying the epoxy. Clean it with acetone or a similar solvent, then lightly abrade it using fine sandpaper or steel wool.
If you’re using a two-part epoxy adhesive, mix equal amounts together for about 30 seconds, until the mixture is uniform in color.
Then apply the adhesive to one of your surfaces and spread it around with a brush until you get an even coating. Once applied, clamp or tape your pieces together and let them sit undisturbed for 24 hours while they bond at room temperature (about 72 degrees F).
You may also want to wipe away any excess glue that squeezes out during this curing period—use some mineral spirits or acetone on a rag and rub gently along the joint line. The surface will be slightly tacky after 24 hours but should fully cure within 48 hours if left untouched.
To finish off your project, you can use either an oil finish or lacquer to achieve whatever look is desired (or leave it unfinished if that’s more your style).
Do I need to seal wood before applying resin?
You can use wood filler to fill any holes, scratches, and dents in the wood. The wood filler is applied and then sanded smooth. After that, the surface is cleaned with a damp cloth.
Once the wood has dried it can be sealed, so that resin doesn’t soak into it before you’re ready for it to dry. Then you can pour your resin over the wood and let it cure.
How do you seal wood before resin?
Estimating the amount of time it would take to completely seal our dining table, we were shocked. It didn’t seem like such a big deal after all.
We had been in our apartment for less than six months and we were already staring down several years of neglect and abuse! At least the epoxy was going to protect the wood from future damage and prevent the table from cracking.
That is unless we tried to sand it first.
The epoxy itself made a quick glue-like impression that could not be sanded off easily. So we resorted to using a sponge and then wiping it over the surface with paper towels as best we could before starting on other projects (we learned later that you can wipe off resin by soaking it in acetone).
As time went on, some patches of primer started peeling off when we accidentally brushed against them with our hands or carried something over them—so it wasn’t too surprising when one day one of those patches peeled up just enough for sawdust to fall out onto our dining room rug.
How do you finish wood and resin?
- Sand the wood with sandpaper
- Apply a coat of epoxy
- Sand the epoxy with sandpaper
- Apply a coat of varnish
- Sand the varnish with sandpaper
- Repeat if necessary
Which is stronger wood glue or epoxy?
Wood glue and epoxy both have their pros and cons, but generally speaking, epoxy is a better adhesive than wood glue. Epoxy is known for its high tensile strength, making it highly water-resistant. It’s also resistant to high heat, has a longer shelf life (about two years), and has a stronger initial bond.
However, wood glue has advantages over epoxy. Wood glue is more flexible than epoxy—which can be an issue if you’re trying to repair something that needs some give (such as a table leg).
It’s also faster drying than epoxy; you can use your DIY project after about 24 hours with wood glue, whereas the same project might take up to 48 hours with epoxy.
If you need more help deciding between the two adhesives, check out this guide from The Family Handyman!
What is the best epoxy glue for wood?
If you’re looking for a strong, water-resistant epoxy adhesive that’s versatile, simple to use, and available in different sizes, we recommend Gorilla Epoxy.
Gorilla has been manufacturing high-quality adhesives since 1978. The company’s products have many uses around the house and are popular among DIY enthusiasts as well as professional contractors.
How do you use epoxy resin on wood for beginners?
Part of finishing your project involves attaching a protective coating to the wood, which is known as a finish. Depending on what you want, there are lots of different kinds of finishes you can use. Epoxy resin is one of the most common, and it can be used in many ways.
It’s also fairly easy to apply and makes a good choice for beginners who want to salvage an old piece when they don’t have the time or tools required to refinish it completely.
Conclusion
When you have the right technique, resin and wood look great together. Use an adhesive that suits your needs, or try something simple like Gorilla glue. You can even combine your own formulas for special projects.
Martin Flood
Martin Flood has been working in the construction industry for over 20 years as a general contractor with expertise in remodeling projects that are large or small. He has furthered his career by specializing in epoxy resin flooring, providing excellent service to both commercial and residential clients. Martin’s experience enables him to offer professional advice on how to choose the right type of project based on your needs and budget.
View all posts by Martin Flood →