

Epoxy for filling wood cracks works because the resin flows into the void, grips the roughened walls, and cures hard enough to be planed, sanded and finished alongside the surrounding timber. Clean the crack, tape or back it so the resin stays put, mix to the label ratio, and pour in thin lifts. The repair outlasts putty because it doesn’t shrink as it dries.
Why epoxy beats putty in a structural crack
Wood moves with the seasons, and a crack in a tabletop or a porch post keeps opening and closing. A hard, brittle filler fights that movement and eventually breaks its bond. Epoxy has enough give and enough grip to ride out small shifts, and it cures to something you can cut with a chisel without it crumbling.
The material also takes a finish. Once sanded flush, a Silicone-free surface scuffs and holds stain or lacquer much like end grain does. That matters on a salvaged piece where you want the repair to disappear.
Where a crack is shallow and cosmetic, a putty is faster. When the split runs deep or the wood is a structural member, epoxy is the safer call. If you are still weighing the two, this comparison of wood repair putty and compounds lays out where each one belongs.
Table of Contents
Tools and materials you actually need
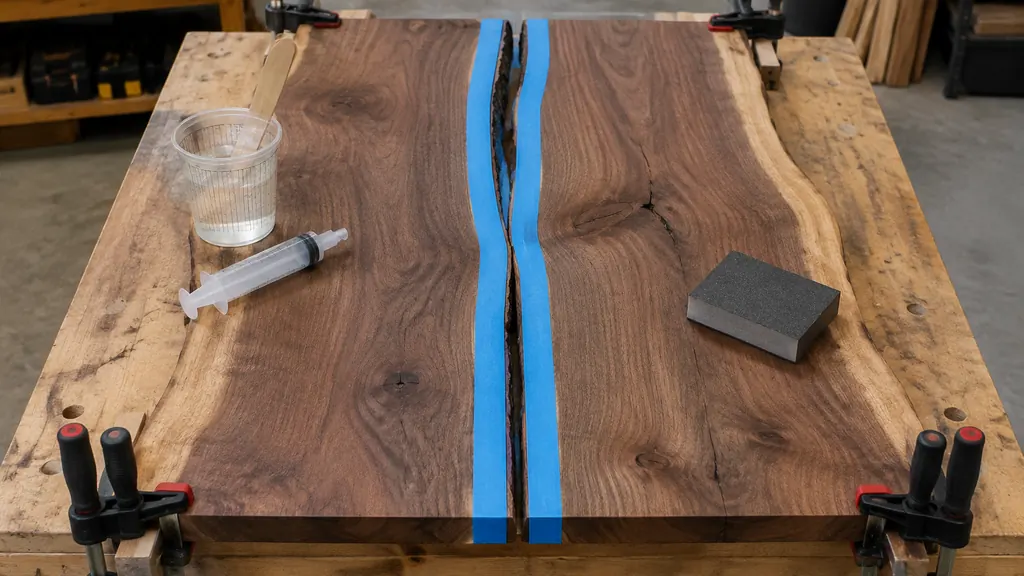
Keep the kit simple. You do not need a workshop full of gear to fill one crack.
- Two-part epoxy, slow-set for deep pours, fast-set for small ones
- Mixing cups and sticks, plus a syringe or pipette for tight cracks
- Painter’s tape and wax paper for backing
- A pick, awl or stiff brush for cleaning the void
- Denatured alcohol for wiping
- Sandpaper in a few grits and a sanding block
- Nitrile gloves and a respirator rated for the vapours
- A heat gun or hairdryer for chasing out bubbles
Slow-set epoxy gives you working time to let bubbles rise. Fast-set is handy in a cold shop in Minnesota in January when you want the pour to kick before you lose the light.
Step-by-step: filling a crack the right way
- Open and clean the crack. Run a pick or awl along the split to lift loose fibres and old finish, then blow out the dust and wipe with denatured alcohol. Resin bonds to clean, slightly rough wood, not to sawdust.
- Clamp or brace the piece flat. A cupped board stays cupped if you pour into it. Clamp the workpiece to a flat surface so the crack sits level and the resin pools instead of running off.
- Back the underside. Tape wax paper or a strip of packing tape under the crack so the epoxy cannot drain through. On a through-crack in a post, wrap the back with tape and press it tight.
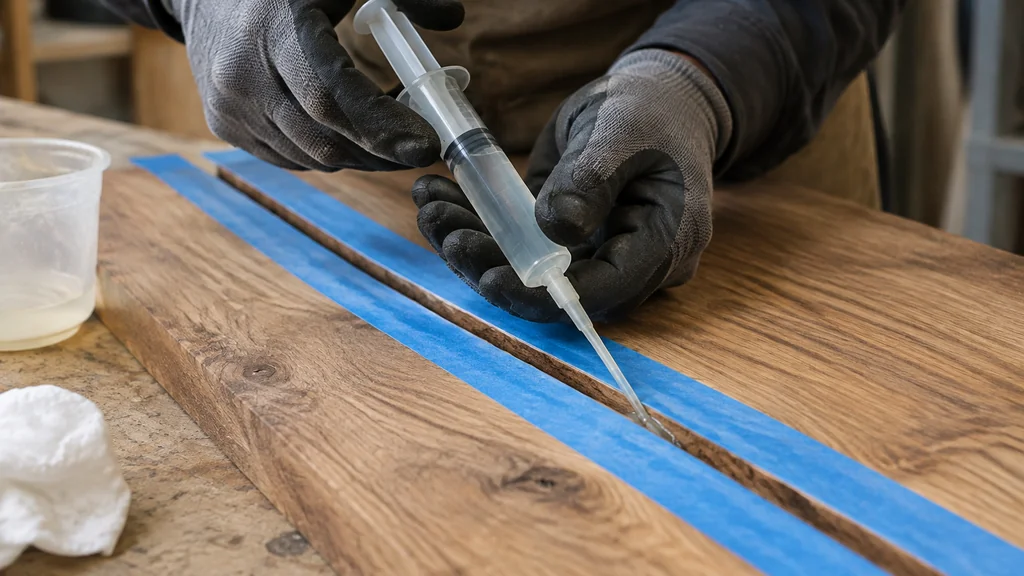
- Mix to the label ratio. Measure by volume with the cups the kit provides, stir slowly for the full time on the label, and scrape the sides and bottom as you go. Fold the mix rather than whipping it, which drags in air.
- Pour in thin lifts. Fill the crack in stages, letting each lift settle before the next. For a deep void, pour partway, let it gel, then top up. This keeps heat from building and stops the resin shrinking back as it cures.
- Work out the bubbles. Pass a heat gun quickly over the surface, or tap the workpiece, so trapped air rises. A slow-set epoxy in a warm room does most of this on its own.
- Let it cure fully, then sand flush. Wait the full cure time on the label, then block-sand with progressively finer grits, keeping the block flat so you do not dish the surrounding wood.
- Finish the repair. Seal with the same finish as the rest of the piece. End grain in the crack drinks more finish, so expect to build a couple of coats.
When the damage runs past a simple split into soft, crumbly wood, the repair changes. This guide to epoxy resin wood filler for rot and damage covers consolidating punky timber before you pour.
Tinting and matching the wood
Clear epoxy dries with a slight amber cast, which reads fine on oak or pine and can look wrong on pale maple. A drop of pigment brings the fill closer to the surrounding grain, and a little goes a long way. Mix pigment into the resin before you add the hardener, then stir thoroughly.
For a repair on dark walnut or a piece you plan to ebonise, a black fill can make a deliberate feature of the crack. There is a real craft to getting that tone right, and the notes on black epoxy resin pigments and finish explain how the pigment load changes the cure and the final sheen.
Test any tint on scrap of the same species first. A colour that looks right in the cup shifts once it cures and takes a topcoat.
Mistakes that ruin the repair
Most failed epoxy fills trace back to a handful of avoidable errors.
- Pouring too deep at once. A thick pour generates heat, cures fast and can shrink or crack. Thin lifts prevent it.
- Skipping the clean. Resin over dust or old wax makes a shell that lifts later.
- Mixing by eye. Off-ratio epoxy stays tacky or cures brittle. Follow the label, every time.
- Forgetting the back. Resin runs straight through an open crack and pools on the floor.
- Sanding before full cure. Soft resin clogs paper and smears. Wait it out.
- Overfilling proud of the surface. A slight crown is fine, but a big dome means a lot of sanding and a risk of dishing the wood around it.
On a cold day, warm the room and the resin before mixing. Epoxy that sits at cellar temperature in February can take far longer to cure and trap more bubbles.
When to call a pro
A hairline crack in a tabletop is a weekend job. Some repairs are not.
If the crack runs through a load-bearing beam, a porch column or a piece of structural furniture, get a carpenter or engineer to look before you fill. Epoxy adds strength, but it does not replace the section of wood that has already failed. Rot that has spread into a joint, a split that keeps reopening after a repair, or a crack in antique furniture with real value all warrant a professional eye.
For valuable antiques, a conservator may prefer a reversible fill that can be undone later. Epoxy is permanent once cured, so weigh that before you pour on a museum-grade piece.
Epoxy Wood Crack Filler FAQ
Can I use epoxy to fill a crack in wet wood?
No. Epoxy needs dry wood to bond, and moisture in the timber fights the cure. Let the piece dry indoors for as long as it takes, then check with a moisture meter before you mix. Wet wood is one of the most common reasons a fill lifts.
How long does epoxy take to cure in a wood crack?
It depends on the product and the room temperature. Fast-set formulas gel in minutes and cure in a few hours, while slow-set versions can take a full day. Check the label and add time in a cold shop. Do not sand until the cure is complete.
Will epoxy crack filler hold in a moving crack?
It handles small seasonal movement well, which is why it beats brittle putty. A crack that keeps opening wide suggests the wood is still drying or the piece is under stress. Fix the cause before you pour, or the repair will fail again.
Can I stain or paint over an epoxy fill?
Yes, once it is fully cured and sanded. Scuff the surface first so the finish grips. Some pigments and hardeners resist stain, so test on scrap. A sealer coat over the fill helps the topcoat blend with the surrounding wood.
Is epoxy filler strong enough for furniture joints?
It bonds well and fills gaps, which helps on a loose joint. For a joint carrying real load, glue and clamping are still the better repair. Use epoxy to fill the void, and check local code on anything built in. It does not replace a proper structural fix.

Martin Flood
Martin Flood has been working in the construction industry for over 20 years as a general contractor with expertise in remodeling projects that are large or small. He has furthered his career by specializing in epoxy resin flooring, providing excellent service to both commercial and residential clients. Martin’s experience enables him to offer professional advice on how to choose the right type of project based on your needs and budget.
View all posts by Martin Flood →