
Wood fillers are a great way to hide large cracks in wood surfaces. However, there is a correct and effective way to use this material. If you pick the wrong filler or use it incorrectly, then your efforts will be wasted and your project will remain unfinished. The worst part is that it would be very difficult for anyone else to fix it unless they’re willing to replace the entire piece of furniture or whatever else you were trying to repair. So below are some tips on how best to use wood filler for large gaps:
choose a filler that matches the finish
The first step to repairing a large gap in your woodwork is choosing the right filler. You want to choose a filler that matches the finish of your piece. If you have an antique table with a finish that looks like it has been polished and waxed for years, using oil-based putty would be inappropriate because it will not match its original look.
Instead, choose a filler that matches the color and texture of your wood. For example, if you have an oak table with an old varnish finish on it, then use an oil-based putty stick instead of plastic wood paste or acetone polish (unless they are also made from natural ingredients).
Table of Contents
- choose a filler that matches the finish
- sand down the edge you are trying to fix
- clean the piece of dust or any other material that could get in the way
- apply with a spatula or putty knife
- wipe off excess and wait overnight
- sand down the filled area
- make sure to feather the edges out so they disappear into the rest of the wood
- stain if necessary
- prime it if needed
- paint the entire surface so that gaps don’t show up after drying
- wood fillers are a great way to hide large cracks in wood surfaces
sand down the edge you are trying to fix
- Use a sanding block or sandpaper to smooth out the edges. If you are using fine-grit sandpaper, it will leave you with a smooth edge and make the wood filler look nice and flush with your wood surface.
- Make sure that you also sand down the edges of your wood filler as well. If there are any jagged edges left after applying the wood filler, they can be easily cleaned up by going over them with some more fine grit sandpaper.
clean the piece of dust or any other material that could get in the way
When you’re filling a large gap, it’s often necessary to clean out the area where you intend to apply your wood filler. To do this, use a vacuum or damp cloth to remove any dust or other materials that could get in the way of your project.
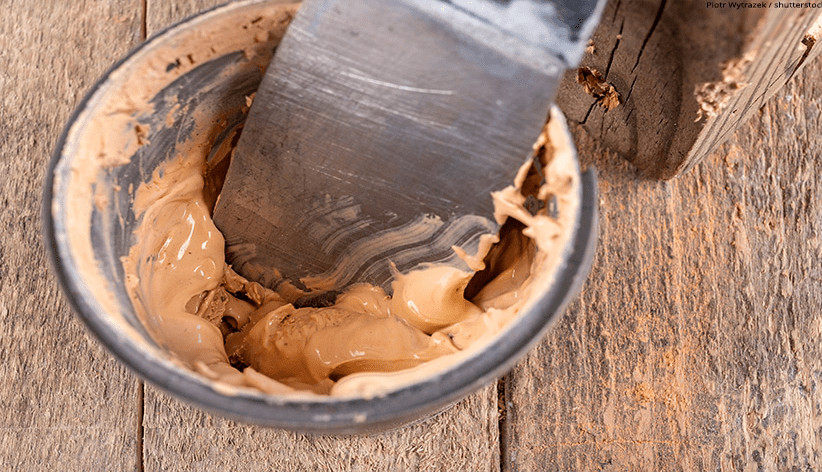
apply with a spatula or putty knife
Use a putty knife or spatula to apply the filler. Applying with a putty knife will allow you to smooth out any lumps or bumps. If you’re applying it with your hands, use your fingers to smooth it on, but make sure that each layer dries before adding another one.
To clean up the edges, use a putty knife as well; if there’s too much gap between the wood and filler, scrape some away with your finger until they are level with each other again. It’s also important that when blending this into the wood (which we’ll discuss next), you don’t leave any brushstrokes or ridges from where you were holding onto it while applying it so make sure everything is completely flat before doing this step!
wipe off excess and wait overnight
When you are satisfied with the filler, wipe it off with a damp cloth. You can also use a rag to remove excess, but this will take more time and effort. Let it dry overnight before sanding.
The next day, use fine-grit sandpaper to smooth out any uneven areas or bumps on your wood surface. Sanding is an important step because if you skip this step and apply paint over gouges and holes in your wood surface, the paint won’t adhere properly—and when you look closely at the area, later on, you’ll see cracks in the dried paint where there should be none!
sand down the filled area
Now that the filler is dry, it’s time to sand down the surface. There are several different ways you can go about this, depending on the size of your object and how much time you have on your hands. A few options include:
- Sanding block
- Fine grit sandpaper (120 or 180)
- Sanding sponge or pad
- Belt sander
If you’re in need of something more powerful than a standard belt sander, consider using a palm sander with an 80-grit paper attachment. This will ensure that all areas are smooth and even before painting or staining your project!
make sure to feather the edges out so they disappear into the rest of the wood
- Make sure the filler is applied in a thin layer. Don’t use too much filler, as it will make it harder to sand, but don’t apply it too thinly either.
- Don’t apply pressure to the wood filler when you are spreading it on. Apply pressure only if you are pushing into an area of already hardened wood filler that needs some more time to dry before sanding.
- Apply quickly and evenly over the entire area of your gap.
stain if necessary
- You can stain or paint the filler, depending on your preference. If you are not staining your project, you can paint the filler after it dries. If you are staining, then you can stain the filler before it drys or wait until it has dried and then apply the stain to achieve a different look.
prime it if needed
If you’re planning on painting over your wood filler, you should prime it first. Primer is a clear coat that helps the paint stick to the wood filler and makes it look more natural. It also helps cover up any imperfections in your work so that everything looks smooth and even.
If you don’t have time for this step, but want to make sure that your project lasts as long as possible, consider using an oil-based stain instead of regular paint. Oil-based stains will penetrate deep into the grain of a piece of wood and prevent moisture from getting through its surface
paint the entire surface so that gaps don’t show up after drying
After you’ve applied the wood filler, it’s time to paint over it. You can use any kind of paint, but a high-quality finish will look better and last longer.
Use a brush or roller to apply your paint in thin coats; this will help prevent crinkling. If you’re using a sprayer, make sure you follow the instructions carefully—it’s easy to get clumps of dried filler stuck in your nozzle if it isn’t cleaned thoroughly after each use.
wood fillers are a great way to hide large cracks in wood surfaces
Wood fillers are a great way to hide large cracks in wood surfaces. They can be easy to use, come in many different colors, and are inexpensive. You can find them at most hardware stores or you can even buy them online!
Conclusion
We hope you’ve learned a lot about wood fillers. They’re a great way to hide large cracks in wood surfaces, and there are so many different kinds available! You can use them on furniture, cabinets, or other project pieces. Just remember that you need to sand down the edges before using any type of filler product because otherwise, it will not blend in properly with surrounding areas. If necessary apply stain or paint overtop for additional protection against dirt/dust getting inside during the application process
Martin Flood
Martin Flood has been working in the construction industry for over 20 years as a general contractor with expertise in remodeling projects that are large or small. He has furthered his career by specializing in epoxy resin flooring, providing excellent service to both commercial and residential clients. Martin’s experience enables him to offer professional advice on how to choose the right type of project based on your needs and budget.
View all posts by Martin Flood →