
Have you ever had a door frame crack or break? If so, then using wood filler is the perfect solution to repair it. Wood filler is easy to use and shouldn’t require any tools besides a little bit of sandpaper (and maybe an electric sander). In this guide, we’ll walk you through how to repair door frames using wood filler and show you some tips for making sure your repairs look professional.
collect supplies
Before you can repair the door frame, you’ll need to collect supplies. These include:
- Wood filler (in the form of a tube or tub)
- Wood glue
- Sandpaper in coarser and finer grades, depending on how smooth you’d like your surface to be
- Stain (optional) – if desired, a stain can be applied prior to applying the wood filler. If you don’t want to stain your wood filler after it dries, then skip this step and go straight on applying varnish!
Table of Contents
- collect supplies
- clean the frame
- let the frame dry
- cut the wood filler to match the hole’s size and shape
- carefully insert wood filler into the hole and smooth it out
- let it dry
- sand it down
- stain the repaired area if necessary
- seal the repaired area with a clear coat or varnish if necessary
- Wood filler is a versatile substance that is easy to use and should be available at any hardware store.
clean the frame
- Clean the frame: Use a damp cloth to wipe away dust and grime from the frame, then dry it with a dry cloth. Using a vacuum will help remove any remaining dust particles from the surface of the wood.
- Remove loose nails or screws: Use pliers to remove any loose nails or screws from your door frame that might be in need of repair, as these can be tricky to work around when filling gaps in your frame.
let the frame dry
Let the frame dry for at least 24 hours. You can speed up the process by using a hair dryer or heat gun, but be careful not to damage any part of your door frame. If you have access to a heat lamp (like those used in stores), use it! This will ensure that all of your wood filler dries in time for you to paint over it.
cut the wood filler to match the hole’s size and shape
- Use the utility knife to cut the wood filler into pieces that match the shape and size of your hole.
- Clean up any rough edges with a fine-grit sandpaper.
- Don’t worry about making it perfect—just get it close!
carefully insert wood filler into the hole and smooth it out
Once you have the hole filled in, use a putty knife to smooth out the wood filler and make sure there are no ridges left behind. If you push too hard, the wood filler will pop out of the hole and you’ll need to start over again. Make sure that after you’ve smoothed out your repair job with a putty knife that there aren’t any bumps or ridges left behind.
let it dry
The next step is to let the wood filler dry. This can take anywhere from 24 hours to a few days, depending on what kind you use and how much of it you apply. If you want to speed up the process, use a hair dryer instead of an oven or other heating method.
Don’t use a heat gun—these are designed specifically for removing paint and varnish from surfaces like doors and walls, and they’ll melt your wood filler as well as anything else they come into contact with. Don’t even think about using a heat lamp either: it won’t be strong enough to get rid of all moisture in your project’s surface at once, which means that some areas will remain damp long after others have dried out completely (and again—you don’t want any part of this drying process happening inside your house). Finally: no hot pads or blankets! While these may seem like good ways to make sure everything gets dry quickly without using more power than necessary, both materials create uneven temperatures across their surface area due
sand it down
Before you start filling the gap in your door frame, it’s important to sand down the surface around the area. This will make sure that there are no sharp edges or splinters left behind as a result of using wood filler on them.
There are several different types of sanders that you can use for this step, including:
- A sanding block (for smaller areas)
- A sander (for bigger areas)
- Sandpaper (for smaller areas)
- A mouse sander (good for removing spackle or paint from corners)
- Belt sander (good for removing large amounts of material quickly)
stain the repaired area if necessary
It’s possible you may need to stain the repaired area if it’s visible. Staining is a color that’s added to wood to cover up its natural color and give it a new one. Stain comes in many different forms, but for this project we would recommend using an oil-based stain because of its ability to penetrate deep into wood fibers and provide long-lasting protection from UV rays and moisture damage.
Oil-based stains can be applied with brushes or rags, and over the bare filler as well (in fact, we recommend it). They’re very thin liquids that dry quickly when allowed to air dry.
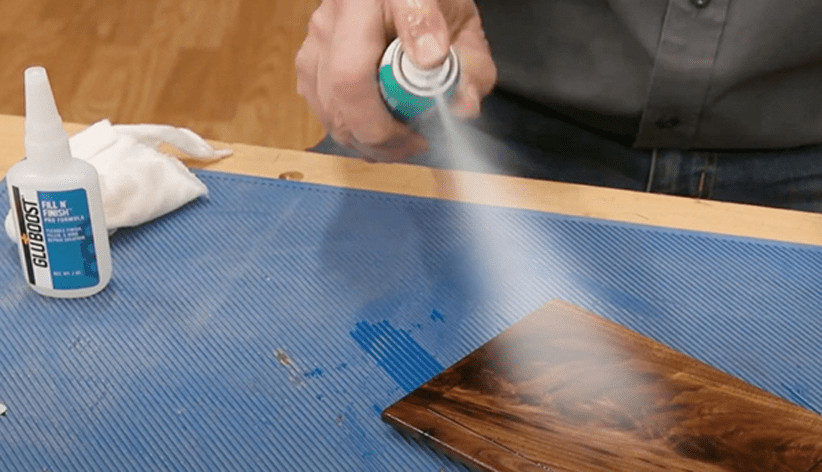
seal the repaired area with a clear coat or varnish if necessary
Once the wood filler is dry, you can apply a clear coat or varnish to protect it from moisture, insects and other problems that could damage your repair. If you choose not to seal it with something like this, it will still be good for a few years of use before you need another repair job.
Wood filler is a versatile substance that is easy to use and should be available at any hardware store.
Wood filler is a versatile substance that is easy to use and should be available at any hardware store.
It’s important to note that not all wood fillers are the same, and it’s important to choose one suitable for your project. Some are waterproof, some can be painted over, and others will require additional steps after application.
Wood filler can be used on many different types of surfaces including: doors, cabinets, furniture and other hardwood surfaces.
Conclusion
Once you’ve allowed the wood filler to dry, you can sand it down and paint over it. If the hole is too large for wood filler alone (which it probably will be), then fill it with a little more spackle before applying two coats of primer and one coat of paint. Make sure you let each coat dry completely before applying another layer!
Martin Flood
Martin Flood has been working in the construction industry for over 20 years as a general contractor with expertise in remodeling projects that are large or small. He has furthered his career by specializing in epoxy resin flooring, providing excellent service to both commercial and residential clients. Martin’s experience enables him to offer professional advice on how to choose the right type of project based on your needs and budget.
View all posts by Martin Flood →