
Resin is a wonderful tool for craft projects. It creates a durable, beautiful finish that will last for years. But did you know that there are plenty of ways to customize your resin project?
You can use words or shapes inside the resin, which can lead to some truly unique pieces. The process isn’t complicated, but it does take some practice and patience. So let’s get started!
How do you put words in resin?
To add words to resin, you’ll need:
- A tool to scratch or engrave the resin. We recommend a needle tool or Dremel tool.
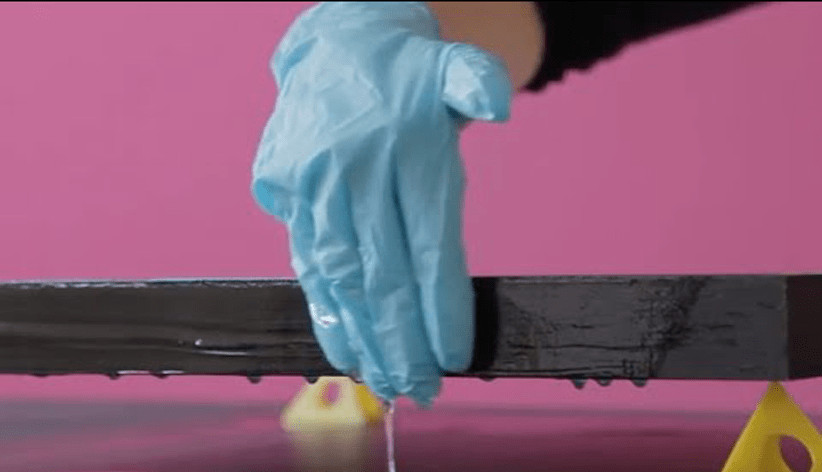
- Resin and glitter if you want it to sparkle like in the example below. You can also use paint pens and fun foam letters!
The process is super easy:
Table of Contents
How do I add information to my resin?
You can add information to your resin using a permanent marker, a paint pen, or even just a regular old paintbrush.
When using these tools, it’s important to remember that you’ll have to take extra care when cleaning up the excess ink from around the engraved area of your piece.
If you find yourself struggling with this part of the process, try using a toothpick or something similar to help lift off excess ink without damaging your design too much.
What can I use to write on resin?
You can use an acrylic paint pen or paintbrush to write on resin. You will want to choose the right type of pen for your project.
A paint pen is best for small areas and writing, while a brush works well for larger areas.
If you are using a sharpie, make sure you have a fine tip sharpie and avoid using it on dry projects as it may smudge or smear.
How do you put the alphabet in resin?
If you’d like to make your own words, or any other three dimensional shape, there are a few ways you can do so. You can use a stencil and a brush to paint letters onto the surface of your resin.
This is one of the most basic methods but it requires some patience and time. Alternatively, if you have access to a laser cutter or CNC router in your area (or know someone who does), then you may be able to cut custom shapes out of thin plastic sheets which can then be glued into place on top of your resin base.
Finally, some people choose to 3D print their own designs using an industrial printer such as those found at local arts organizations or schools.
How do you customize resin?
You can customize your resin with a paintbrush or pen. You can use many different types of Sharpie markers to customize your resin, too.
Can you write on resin with Sharpie?
Sharpie pens can be used to write on resin. Sharpie pens are permanent, but not waterproof. You can use them on any surface and they work great on glass and resin.
How do you paint engraved resin?
Here are some ways you can paint engraved resin:
- Acrylic paint- This is the most simple way to add colors to your 3D printed model. You can buy acrylic paints at any craft store, or even at Walmart. Just make sure to get a very light color so that it doesn’t cover up the engraving!
- Oil paint- If you want more intense colors and/or smoother brush strokes, try oil paints instead of acrylics. They tend to be thicker and stick better on plastic than acrylics do, but they also take longer to dry and can be hard to control when applying them.
- Spray Paint- Some people like using spray paint because it’s quick and easy but still makes a bold statement with its vibrant colors! However, if you’re concerned about how much spray will come off on your hands while spraying (and this may happen even if you wear gloves), there is another option…
Can you use acrylic paint inside resin?
Acrylic paint is water-based, so it’s not compatible with resin. The best thing you can do to get your project painted is to use a brush or paint pen.
The easiest way to paint resin is with a brush. You can use any kind of brush, but for less mess and easier clean up, I recommend using an old toothbrush or paintbrush that you don’t mind getting ruined by the resin since you’ll be throwing it away afterward anyway!
Using a small amount of acrylic paint (just enough to cover the area), dip your brush into the paint and then dip it into the top of your container of resin until most of it has been absorbed by the bristles of your brush (or just fill up as much as possible).
Then start painting! Use long strokes from left to right, from top-to-bottom, and all around until everything looks good enough for you!
Conclusion
In this article, we have discussed the different ways you can add words to resin. We hope you found it useful!
If you have any questions about this process or want to share your own experiences with us, please feel free to leave a comment below.
Martin Flood
Martin Flood has been working in the construction industry for over 20 years as a general contractor with expertise in remodeling projects that are large or small. He has furthered his career by specializing in epoxy resin flooring, providing excellent service to both commercial and residential clients. Martin’s experience enables him to offer professional advice on how to choose the right type of project based on your needs and budget.
View all posts by Martin Flood →