
When you run into a problem with wood, it can be tempting to throw some wood filler on it and call it good. But what is the best type of wood filler?
How thick does it need to be? And how do you make sure that your repair is going to last?
To help answer these questions, we’ll walk through all the different types of wood fillers out there: from traditional putty to modern paints and adhesives.
And we’ll learn how each one works best for different applications so that you can start making your own repairs instead of calling in an expensive professional every time something breaks!
What is the strongest wood filler?
- Epoxy resin. The most popular type of wood filler is a polyurethane resin that’s mixed with hardener and catalyst. The epoxy resin dries quickly and doesn’t shrink, making it ideal for filling cracks or gaps in woodwork.
- Polyester resin. A polyester wood filler (also known as “polyester putty”) is a mixture that contains an organic binder like wax or oil, which makes the material flexible enough to expand when it’s applied to wood surfaces during installation or repair projects but doesn’t shrink like other types of epoxy fillers do after they dry out completely over time due to exposure from sunlight or heat sources like radiators inside your home as well as other sources outdoors such as direct sunlight during summer months when temperatures rise above 100 degrees Fahrenheit outside at noon all day long until sundown later tonight around 8 pm on Sunday under cloudy skies;
Table of Contents
- What is the strongest wood filler?
- How do I choose a wood filler?
- What is the difference between wood filler and wood putty?
- How thick can wood filler be applied?
- Is wood filler permanent?
- How do you fill large gaps in wood trim?
- Does wood filler get as hard as wood?
- How do you fill holes in wood with wood filler?
How do I choose a wood filler?
When choosing a wood filler, there are several factors you should consider. First and foremost, look for a filler that matches the wood you’re using.
If your wood is dark and has lots of grain, choose a light-colored filler that has similar properties to help it blend in with the rest of your project.
Second, consider how easy the filler will be to sand down once it’s dry—the more porous it is (more open spaces between fibers), the more likely it’ll be easy to get smooth surfaces when sanding down. Thirdly, think about whether or not you want/need something that dries quickly or slowly; many fillers can take up to 24 hours before they completely harden up enough for painting purposes.
Some wood fillers need only two hours while others require up to 48 hours! Last but certainly not least: how do you feel about cleanliness? Do you like having things around after they’ve been used or would rather just toss them out afterward?
What is the difference between wood filler and wood putty?
It’s important to understand the difference between wood putty and wood filler. Putty is a thicker, more stringy substance that comes in a tub or tube and is used for filling holes in wood furniture or cabinet frames.
Filler, on the other hand, is easier to work with because it’s more like a putty that can be smoothed into place with your fingers instead of requiring you to pound it into shape with a mallet as you would with traditional putty.
Filler often has an orange tint to it while regular white-color putty will have a more natural color. While both products are effective at filling cracks and holes in wooden surfaces, you’ll find that fillers tend to cost significantly more than ordinary white-colored wood fillers.
How thick can wood filler be applied?
Once you have your wood filler, you can apply it as thick as 1/4 inch. You can also apply the wood filler in layers, which is helpful when there are deep scratches that need to be filled.
After applying each layer of wood filler, sand the area and let it dry before applying another layer if needed.
Is wood filler permanent?
Wood filler is a temporary solution. It does not last forever and will eventually need to be repaired or replaced. The best news about wood filler is that it can be painted over!
How do you fill large gaps in wood trim?
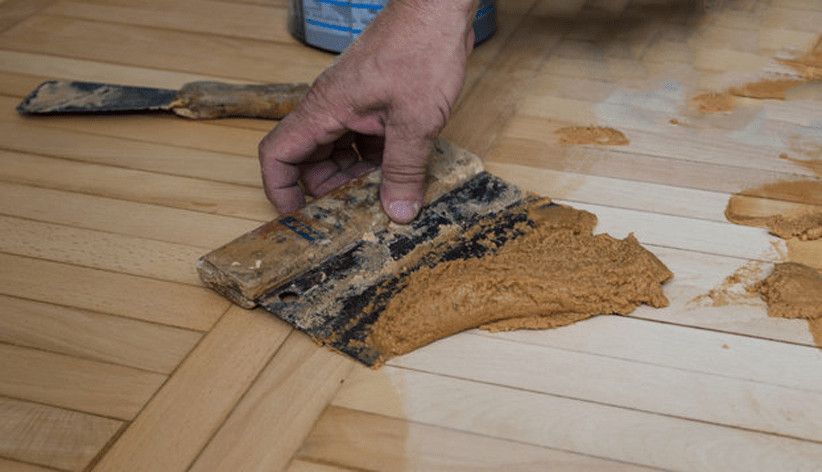
For small gaps, use a putty knife to spread the filler into the gap. If you don’t have a putty knife, you can use a butter knife–it’s not ideal, but it’ll work.
Make sure that when you’re spreading the filler out of your gap that it is level with the surrounding surface; this will help keep moisture from getting trapped inside and causing damage over time.
Keep in mind:
- Use enough filler so that when you’re done spreading it out and smoothing over any imperfections with your finger or putty knife, there are no visible gaps or thin spots where moisture could be trapped inside.
Does wood filler get as hard as wood?
Wood filler is not as hard as wood, but it can get harder over time. Wood filler is, however, more flexible than most woods (it will bend and flex before breaking) and it’s also less brittle than many other types of wood.
This means that you don’t have to worry about it getting chipped or cracked just from regular use.
However, wood filler tends to be more prone to cracking later on—especially if the material you’re working with has a lot of moisture in it (like your bathroom floor).
So while this product may seem like an ideal solution for everyday fixes around the house right now—as long as you don’t mind waiting several months before seeing any results—you might want to consider other options if your goal is something that needs immediate results or better durability over time.
How do you fill holes in wood with wood filler?
Now that you know what a good filler is, let’s talk about how to use it. First things first: fill the hole with wood filler and let it dry.
If you’re working on a large project, this will likely involve more than one application of filler as well as several hours’ worth of drying time between coats.
Once your filler has dried (or dry enough), sand off any rough edges or bumps with fine-grit sandpaper until the surface is smooth and even again.
You should also be able to see the color of your wood underneath—this is good! This means that you’ve successfully filled your holes without obscuring them completely by overfilling them with glue or messily applying too much wood putty.
Finally, prime and paint according to whatever standard painting protocol applies in your specific case—it’s important not only because it makes everything look better but also because if there are still some rough patches after priming/painting them they’ll stick out like sore thumbs once they’re covered up by paint again!
Conclusion
If you follow these simple rules, you can use wood filler to repair almost any surface. And remember that if your project is large enough or complex enough, it may be worth hiring someone with more expertise than yourself—but don’t let that stop you from trying!
The best way to learn is by doing, and there’s no better way to get started than by tackling a few small repairs at home.
Martin Flood
Martin Flood has been working in the construction industry for over 20 years as a general contractor with expertise in remodeling projects that are large or small. He has furthered his career by specializing in epoxy resin flooring, providing excellent service to both commercial and residential clients. Martin’s experience enables him to offer professional advice on how to choose the right type of project based on your needs and budget.
View all posts by Martin Flood →