
Wood filler is a useful tool for repairing and strengthening wood. You can fill holes in wood with it, make splintered edges look good again, and even patch large gaps where pieces of your furniture or cabinetry have fallen off.
You may have heard about using some other materials like glue or caulking as a substitute for wood filler—and that’s not always the best option.
In this article, we’ll discuss what you should use instead of standard wood filler when repairing damage to your house. We’ll also show you how to make your own DIY version at home if you don’t have any on hand!
What can I use to fill holes in wood?
- Use a plug to fill the hole.
- Use epoxy to fill the hole.
- Use CA glue to fill the hole (instructions here).
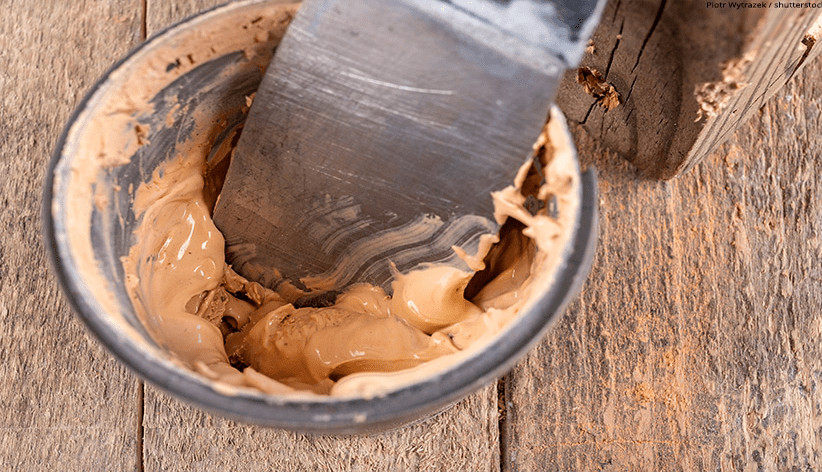
- Wood putty, like this one from Gorilla Glue (or any other brand), can be applied directly onto a surface and then sanded after it cures overnight or longer depending on your speed and experience level with using wood putty products (image courtesy of Gorilla Glue). If you don’t have any experience with wood filler products then follow these instructions carefully before attempting this step yourself because wood putty is easy to use but very difficult to remove if you make mistakes!
Table of Contents
How do you make wood filler at home?
Wood filler can be made at home with a few simple ingredients. Mix equal parts sawdust and white glue, or add water to flour and mix until the consistency is thick enough for spreading.
Use this mixture as you would any other wood filler: spread it over the hole, smooth it out with a putty knife, and let it dry completely before sanding.
Should you fill holes in wood?
Depending on the size of your hole, you may be able to repair it with a putty knife. If you need something stronger than wood filler and paint, try a drill.
If you want to hide the hole completely and make your project look like new, consider using a plug cutter or dado set mounted on your router table.
How do you fill in large holes or gaps in wood?
To fill larger holes and gaps in wood, you need to use more filler. Using too much filler will leave your project looking sloppy and unprofessional, so here’s how to get it right:
- Use a putty knife or similar tool to spread the wood filler into the area where you want it. Don’t be afraid of using a lot of force—you don’t want any bubbles in your work! Just make sure not to apply too much pressure when spreading out the material.
- Once the filler is evenly applied and matches up with the surrounding surface (don’t worry if there are still some visible flaws), use another tool (such as an old plastic spoon) or even just your finger if necessary) and smooth out all remaining imperfections until everything looks nice and smooth. It’s important not to leave any obvious signs of being filled because this could give away that something has been repaired or modified on purpose!
- Let dry for at least 24 hours before applying another layer if needed; otherwise wait until one layer has dried sufficiently enough before applying another coat so that no cracks appear later down the road due to shrinking/expanding processes occurring during curing times between layers applied consecutively versus individually within different environments such as outside vs inside our homes etcetera…
Can you use caulk as wood filler?
No. Caulk is not a good filler for wood because it’s too soft and would be unable to fill holes in wood.
Can you use wood glue as wood filler?
- No. Wood glue is not a wood filler.
- Wood glue is not a substitute for wood filler, and it will not work to fill holes in wood. It’s important to understand the difference between the two so that you can choose the right product for your project: while they look similar and are often used interchangeably, they actually serve very different purposes.
Wood glue contains water-soluble polymers that bond pieces of dry or dampened wood together by forming a thin layer of hardened plastic at their interface. This adhesive layer can hold objects together during assembly without being visible on the surface of finished pieces (though some glue lines may appear if joints have been clamped). The goal when using this type of adhesive is always to make sure that both surfaces are completely covered with an even distribution before clamping together tightly; otherwise, you run risk of leaving gaps where moisture could collect and lead to rot or insect damage later on down the road!
If you’re looking for something that will fill holes faster than normal epoxy putties but still keep costs low enough for everyday projects like picture frames or furniture repairs then opt instead for pre-mixed composite fillers such as those found.
What can I substitute for wood filler?
If you’re a DIYer, here are some options to consider:
- Use beeswax. It’s not just for your morning coffee anymore. Because it’s so soft, you can use it to fill small holes in wood and create an even surface for painting (or varnishing). Beeswax has a low melting point, so before using the wax, be sure to heat it in the microwave or oven until it’s liquid—the same way you would with wood filler. You might want to use a brush or rag when applying the wax—because of its sticky consistency, applying too much at once could be tricky.
- Use car wax as a filler substitute. If you’re looking for an alternative that will last longer than beeswax and provide more coverage than glue alone can provide, try mixing varying amounts of car wax with mineral spirits (a solvent used as paint thinner). Spread this mixture over areas where there are gaps between planks; once dry (which should happen after just 30 minutes), sand down any raised edges left behind by the mixture before finishing your project with an exterior varnish coat if desired!
How do you make wood filler with glue?
- Mix white glue with water in a bowl until the mixture is thick, but not too runny.
- Apply the glue mixture to your wood board with a paintbrush, remembering that it’s better to apply more than you think will be needed rather than less. It takes a little practice to figure out how much you need for each application—you’ll want to apply enough so the filler is easy to sand down later on, but not so much that it raises up when dried or pulls away from the wood surface when dry (which will make sanding difficult).
- Let this dry completely before attempting an additional layer of filler; otherwise, you may just end up smearing wet filler over everything! We recommend giving drying time between three hours and 24 hours depending on how thickly you applied your initial coating of glue mixture and whether or not there’s any humidity in your area at all times.”
Conclusion
If you’re looking for an easy way to fill holes and gaps in wood, we recommend using a product like Minwax Fast-Fill Wood Filler.
This product is specially formulated for filling small holes and cracks in wooden surfaces. It dries quickly and has no odor, making it ideal for use indoors or outdoors!
The filler comes in two formulas: a classic formula that can be used on all types of wood and finishes; and an ultra-premium formula that bonds with wood fibers so that repairs are undetectable after drying (it also comes with special tools).
Martin Flood
Martin Flood has been working in the construction industry for over 20 years as a general contractor with expertise in remodeling projects that are large or small. He has furthered his career by specializing in epoxy resin flooring, providing excellent service to both commercial and residential clients. Martin’s experience enables him to offer professional advice on how to choose the right type of project based on your needs and budget.
View all posts by Martin Flood →