
I have a confession to make: I’m a big believer in wood fillers. I’m not ashamed of it either, which is why we’re here today. I’ve learned over the years that wood filler can be used for so many different things, from fixing dings and dents to filling screw holes and even making repairs on finished wood. This article will show you how to fix any mistakes on stained wood using simple techniques anyone can do with just a few tools!
wood filler
Wood filler is a substance that you apply to cracks and holes in unfinished wood. It can help cover up flaws, such as knots or scratches, and make your piece look more professional. Wood fillers are available at most hardware stores in a variety of different types, but each option has its own benefits, drawbacks and applications. If you’re unsure which one to choose, here’s everything you need to know about using wood filler:
Table of Contents
- wood filler
- wood stain
- putty
- wood filler showing through the stain
- wood filler shows through the paint
- wood filler showing through the varnish
- how to fix mistakes on stained wood
- how to fix screw holes in stained wood
- easy way to fix screw holes in stained wood
- what is the best way to fix screw holes in stained wood?
- use this technique to fix your mistakes on finished wood
wood stain
Wood stain is a type of water-based paint that provides color and protection to wood surfaces. Stains can be used to create a variety of looks, from light tones that resemble pine or ash to darker finishes like walnut or cherry.
Stains are typically applied over raw wood, but they can also be used as an alternative to a clear finish when painting furniture. They’re ideal for small projects because they’re easy to apply and dry quickly—ideal if you’re on a tight budget!
There are three different types of stains: oil-based stains which dry slowly but penetrate deep into the wood grain; water-based stains which are easier on your hands but have less staying power; and gel stains which offer more durability than standard liquid paints but require more time for curing before finishing with polyurethane (poly).
Oil-based products tend not only take longer than other types of stain (about 12 hours) but also leave behind an odor during application due to their chemical makeup. If this isn’t something you feel comfortable around then we recommend using either one of our water-based or gel options instead!
putty
Putty is a type of filler that’s used to fill gaps and holes, such as screw holes. It can be found at most hardware stores and comes in various colors. You’ll need to decide which color matches your wood. If you want the putty to look just like stained wood, choose one that’s similar in color to the stain you used on your project.
If there are screw holes showing through your stain, use some sandpaper or steel wool to remove any excess putty from around the hole before painting over it with primer or paint of choice!
wood filler showing through the stain
How to fix wood filler showing through the stain
The first thing to do is sand all the surfaces of your piece of furniture. You can use 220 grit sandpaper for this and make sure you keep going until all of your filler has been removed. If there are still any marks left, go back over them with 100 grit paper and then 220 again before moving onto the next step. Once you’ve done that, wipe down all surfaces with a damp cloth so they’re nice and clean, then apply some stain remover on one side only so that it doesn’t spread across both sides at once (this will make things really messy). Let this sit for about 10 minutes before wiping off any excess liquid with a rag or paper towel; repeat twice more if necessary until there’s no sign of color coming off onto anything else around it!
wood filler shows through the paint
- Use wood filler to fill in small holes or cracks.
- Use wood filler to fill in screw holes.
- Use wood filler to fill in dings.
- Use wood filler to fill in gouges.
- Use wood filler to fill in small gaps between the boards of a wooden fence or deck, or between floorboards where they may have shifted slightly over time due to wear and tear on your home’s structure.
wood filler showing through the varnish
If you’re applying stain with a paintbrush, use a rag or foam pad to apply varnish. Wood filler can be difficult to cover with stain and some stains don’t blend well with varnishes. If this is the case, you’ll need to apply the varnish first with a rag or foam pad before applying the stain.
If you’re applying varnish with a paintbrush, use either a sponge or foam brush for the stain application. Using these tools will allow for smoother consistency between your two steps of finishing your project!
how to fix mistakes on stained wood
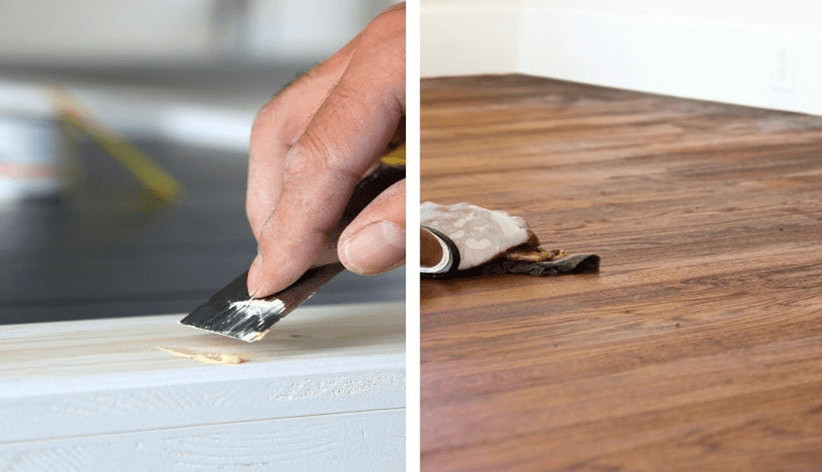
If you’ve used wood filler to patch up your stained wood, you might notice that it’s still showing through the stain. Here’s how to fix it:
- Use a putty knife to apply the wood filler to your project. Make sure that it is smooth and even with the surface of the wooden project.
- Use a putty knife to smooth out any bumps or ridges left by previous coats of stain or paint after removing excess stain and sanding down any rough spots in preparation for a new coat of stain. This will make sure everything looks nice and even before applying another coat of stain so that there is no visible seam between two different finishes (i.e., unstained vs stained). It also helps prevent cracking later on down the road due to varying temperatures throughout seasons if left untreated!
how to fix screw holes in stained wood
- Use a putty knife to apply the putty to the hole.
- Use a putty knife to smooth the putty by pressing it into place and pulling it across, making sure you get as close to the hole edge as possible (this will prevent excess filler from showing).
- Let dry completely before sanding with 180-grit sandpaper and reapplying stain if desired or passivating and varnishing, depending on your project’s needs (for example, if this is going on an outdoor table that’ll be exposed to weather year-round).
easy way to fix screw holes in stained wood
- To fix a screw hole in stained wood, mix some wood filler with some water.
- Apply the mixture over the screw hole and smooth it out with your finger.
- Let the filler dry for 24 hours before sanding (which will also help you remove any excess). The wood filler should dry to a matte finish that’s slightly darker than your stain color. If you want to match the stain exactly, don’t leave too much time between application and finishing—about two minutes is all you need here!
what is the best way to fix screw holes in stained wood?
If you’re looking to fix a screw hole in stained wood, there are a few steps you should take. First, use a putty knife to fill the hole with wood filler. Use as little of the substance as possible and apply it with gentle pressure on the putty knife. Then use a damp rag to wipe away any excess filler from around the area of your project where you applied it. Finally, use another damp rag to remove any remaining filler from your hands and absorbent materials such as sponges or paper towels that were used during this process (you could also just rinse them off thoroughly in running water).
use this technique to fix your mistakes on finished wood
You’ve made a mistake and the wood filler has shown through. Don’t panic, there are a few steps you can take to fix it:
- Apply wood filler to the screw hole and then sand it down until it’s even with the surrounding area of the stain.
- Stain over your repair work so that when you apply varnish over it, everything will match up nicely (and no one will know what happened).
Conclusion
We hope you have enjoyed this guide on how to fix wood filler showing through stain. The best way to learn is by doing and with these tips in mind, we are sure that you will be able to fix your mistakes on finished wood with ease!
Martin Flood
Martin Flood has been working in the construction industry for over 20 years as a general contractor with expertise in remodeling projects that are large or small. He has furthered his career by specializing in epoxy resin flooring, providing excellent service to both commercial and residential clients. Martin’s experience enables him to offer professional advice on how to choose the right type of project based on your needs and budget.
View all posts by Martin Flood →