
When you’re staining your woodwork, it’s important to know how long the stain needs to dry before you sand.
For example, if you use a water-based stain and don’t wait long enough between application and sanding, the wood filler can show through.
So what do you do when that happens? There are several ways to get around this problem: You can add more filler or putty; apply an oil-based stain instead; or try one of these tricks:
Why is my wood filler not taking stain?
The most common reason wood filler won’t take stain is because it hasn’t been sanded smooth. Wood filler must be completely dry before it is sanded, or the remaining glue will prevent the stain from sticking to the surface.
If your staining project involves a lot of wood filler and you haven’t allowed enough time for it to dry properly, try leaving the piece undisturbed for another day before continuing with your stain application.
Another common reason why this happens is that you have used too much wood filler on your project; if there’s too much excess filling material in one area, it can impact how well your finish coats adhere to those surfaces.
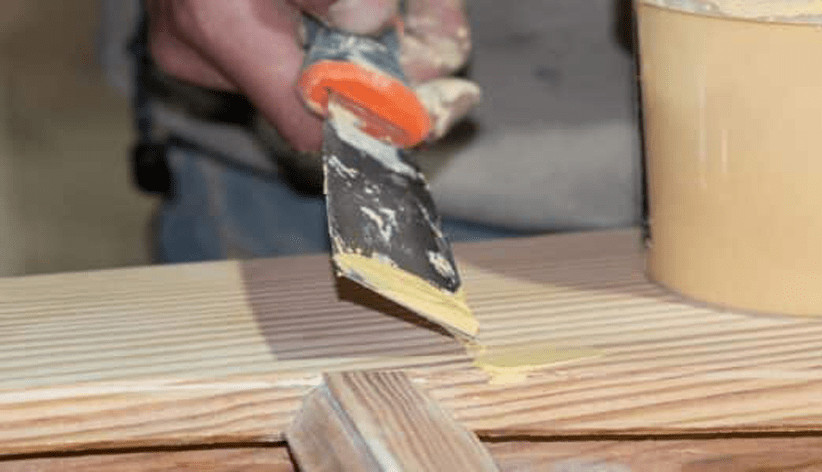
In this case, use a damp rag or fine grit sandpaper (150-400) and lightly wipe away any excess material until only smooth, even surfaces remain throughout all pieces being stained.
Table of Contents
How do you get wood filler to stain?
If you’re having trouble getting wood filler to stain, first make sure the wood filler is compatible with the stain. If the two products are incompatible, it won’t take.
Next, apply the stain to a small area of your project and let it dry for at least 24 hours. After that period of time, check to see if it has taken by gently rubbing a finger over where you applied it. If there’s still no color change or darkening in that spot, apply more and leave it alone for another 24 hours before checking again.
If after three days there’s still no reaction from your wood filler or if you’ve tried several different brands already without success? Time to try something else!
Can I put a stain over wood filler?
Yes, you can put a stain over wood filler. The key is to make sure that the wood filler is dry before applying any stain. If you’re not sure if it will take the stain or not, then test it first on an inconspicuous area of your project.
You may also want to choose a different type of stain if you don’t like the color of your wood filler once it’s dry; another option would be to wait until after staining and apply a second coat of paint instead.
How do you make wood filler darker?
You may be able to darken your wood filler simply by using a darker filler. This is the easiest way to get the results you want and will save time, but it’s not always possible or cost-effective.
If you have access to different shades of wood filler and stain, try mixing them together until you achieve the desired color before applying it onto your project.
Again, if this doesn’t work for you, simply wait for your wood filler to dry completely before staining. Use one coat of stain after 24 hours has elapsed since application of the filler; then let it dry overnight before applying another coat if necessary.
Why is a stain not working?
- The wood filler is too thick. If the wood filler is not thinned with water, it will be harder to stain.
- The wood filler was not sanded enough before you applied the first coat of stain. Your piece needs to be as smooth as possible before applying any type of finish, including polyurethane, lacquer or shellac. Any unevenness in the surface causes blotches in your finished product.
- You did not prime your piece first with oil-based primer and then seal it with an acrylic clear coat (polyurethane or lacquer). Priming helps the finish stay on longer by making sure that all of the pores are filled in so they don’t absorb any moisture from washing or cleaning later on down the line!
Why is wood filler showing through paint?
There are a few reasons why wood filler may not be taking to the paint. If you’ve recently refinished your piece, it’s possible that your wood filler is still too thick, or still too rough.
You can also try sanding down the area where you applied wood filler so that it’s smoother and therefore easier to apply paint over.
If none of these suggestions work after trying them out in succession, you’ll want to take off all of your existing paint by sanding it away and then starting from scratch with fresh products like primer and paint.
What kind of wood filler can you stain?
When you’re looking at wood filler, keep in mind that it’s made from a variety of different materials. Some wood fillers are made from sawdust, some are made from sawdust and glue (or other binding agents), and others are made from sawdust, glue, and wax. A few varieties also include pigments to give the filler its color.
You’ll want to make sure you choose a filler that’s compatible with your paint or stain so that it doesn’t leave an unintended color behind when it has dried.
How long should wood filler dry before sanding?
When you’re using wood filler, it’s important to wait for the filler to dry before you sand it. Sanding wet wood filler will cause the underlying surface to be damaged, and you’ll have to start over.
If the filler hasn’t completely dried yet, wipe away any excess with a damp cloth and let it sit for another 12 hours or so.
Once the wood filler has dried completely (you can tell by touching it—if it feels hard and smooth like real wood), sand away with fine-grit sandpaper (220 grit or higher). Don’t use a power sander; they don’t always get into tight corners well enough on their own without damaging the surrounding area.
Conclusion
If you’re looking for a way to make wood filler stainable, we recommend trying our wood filler stain. It’s specially formulated to work with all types of wood filler and give your project that perfect finish that will last for years to come!
Martin Flood
Martin Flood has been working in the construction industry for over 20 years as a general contractor with expertise in remodeling projects that are large or small. He has furthered his career by specializing in epoxy resin flooring, providing excellent service to both commercial and residential clients. Martin’s experience enables him to offer professional advice on how to choose the right type of project based on your needs and budget.
View all posts by Martin Flood →