
Wood fillers are handy for the home, but there are a lot of misconceptions about what they can do. This guide will clear up some common questions about wood filler and show you how to use this material in your projects.
What is Wood Filler?
Wood filler can be used to fill in holes and cracks in wood. It is a type of spackling paste that helps to strengthen the wood by creating a more durable surface on which to paint or stain.
Wood filler comes in different types, including metal-colored (brass, bronze), plastic/polyester resin (or other synthetic materials) and natural fillers like ground up walnut shells or sawdust. Wood fillers are available at hardware stores and home centers as well as some big box retailers such as Lowe’s and Home Depot.
Table of Contents
- What is Wood Filler?
- What Can I Use as Wood Filler?
- Is Polyfilla Waterproof?
- Choosing the Best Wood Filler for the Job
- Using Wood Fillers Safely
- Drying Times of Different Types of Wood Filler
- Applying Wood Filler to Your Project
- Sanding and Polishing Your Work with Wood Filler
- Disadvantages of Using Wood Fillers
- Wood fillers are handy things to keep in your workshop, but you need to understand how they work and what they are best suited for.
What Can I Use as Wood Filler?
So now we know what wood filler does, but what can be used as wood filler? There are many options available. They all have their pros and cons, so it’s important to know what kind you need before deciding which one to use. Some of the most common types include:
- Polyfilla – This is a type of plaster that comes in two parts and is mixed together at home by adding water until it has a smooth consistency. It dries quickly and doesn’t need sanding between coats, but its main disadvantage is that it’s not waterproof or heatproof.
- Plaster – Plaster is another popular option for DIY projects because it dries quickly and provides excellent coverage over large areas. However, this material must be applied carefully because too much moisture can cause cracking or flaking off later on down the line—and once again there’s no way around needing to sand between applications if you want high-quality results!
Is Polyfilla Waterproof?
Polyfilla is not waterproof. It can be used to fill holes and cracks in wood, but it’s not a good choice for waterproofing.
Waterproofing involves keeping water out of the home, which Polyfilla does not do.
Choosing the Best Wood Filler for the Job
Choosing the right wood filler for your project can be a bit of a conundrum. That’s because there are so many factors to consider:
- What type of surface will be filled?
- What type of job do you need to be done?
- How long will it take for the filler to dry and cure?
Hopefully, this guide has helped you understand how to choose the best wood filler for your specific needs. Just remember: don’t use a wood filler that isn’t waterproof if you’re working on an outdoor project or want something that is impervious to water damage in general!
Using Wood Fillers Safely
- Wear gloves and a dust mask.
- Wear eye protection.
- Wear clothes you don’t mind getting dirty, and keep your hair tied back to prevent it from becoming covered in filler dust.
- Make sure the area to be filled is free of excess sawdust and other debris that may have been left behind by your project.
Drying Times of Different Types of Wood Filler
If you’re looking for a wood filler that dries quickly, Polyfilla is your best bet. This type of wood filler can be used to repair small cracks and holes in furniture and decorative items such as shelves or picture frames. When used as directed, it usually sets within 24 hours and can be sanded after drying for about an hour.
Epoxy fillers are also known for their fast drying times; most epoxy fillers dry within 24 hours, though some may take longer depending on the thickness of your project’s surface area. Epoxy fillers are great for repairing large areas like underneath paneling or floors because they help prevent future leaks from occurring due to broken pipes below ground level
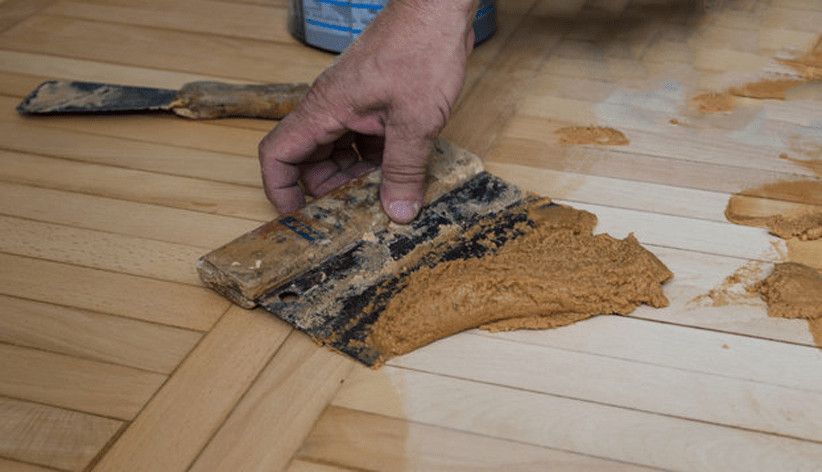
Applying Wood Filler to Your Project
- Apply the wood filler to the area where you want to repair the damage.
- Use a putty knife to smooth it into the hole, then use a wet sponge to clean off any excess filler.
- Let it dry overnight and then sand it smooth.
- Paint your project!
Sanding and Polishing Your Work with Wood Filler
Once your wood filler is dry, it’s time to sand and polish. The first thing you need to do is decide what grit of sandpaper you want to use. The higher the number, the finer the sandpaper will be. This is important because you want a smooth finish so that your paint or stain can adhere properly. If you choose too fine of grit, however, it could take forever—and possibly ruin your project by creating more work than necessary.
Once you’ve decided on which grit of sandpaper to use (I recommend starting with something between 120-150), get out some old clothes and safety goggles just in case things get messy! Put on some gloves as well so that when you start working with the wood filler itself (which can get hot during drying) doesn’t burn yourself.
Use a block over steel wool for best results since many people have reported getting splinters from using this method instead-but if steel wool works better for YOU then go ahead! Once everything is prepped let’s start by cleaning up our work area so we don’t accidentally spread dust when we start working with our hands again later on down the line…
Disadvantages of Using Wood Fillers
There are a few disadvantages to using wood filler. One is that, if you’re not careful, it can be messy to use. Wood fillers need to be applied with a putty knife or other tool in order to form a smooth surface and spread evenly. This may not seem like much of a hassle at first glance—but if you’re working on large areas with heavy coats of filler, you might find yourself spending more time cleaning up than actually making progress on the project!
Another issue is that some fillers aren’t waterproof or strong enough for the job at hand. A good rule of thumb when choosing your wood filler is this: The longer the name of your choice sounds like an episode title from The Golden Girls (and no matter how many times I’ve tried “Glamorous Grandma” just doesn’t work), then chances are good that it won’t do what you want it to do. If it’s too soft and delicate for its own good but still promises strength and waterproofness… well then there’s probably something else wrong here too!
Finally (and most importantly), make sure any product used around water sources has been labeled as safe for those applications before using them on any project involving contact with water sources! Some fillers contain harmful chemicals which could contaminate drinking water sources if given even one chance; avoid these products entirely unless absolutely necessary.”
Wood fillers are handy things to keep in your workshop, but you need to understand how they work and what they are best suited for.
Wood fillers are handy things to keep in your workshop, but you need to understand how they work and what they are best suited for.
The first thing you should know about wood fillers is that they aren’t waterproof. They’re usually made of a similar kind of material as the wood you’re filling, but with added binding agents so that it doesn’t bleed through. The second thing is that not all kinds of wood filler are suitable for all materials or situations. For example, some people have used carpenter’s glue (also known as yellow glue) when trying to patch up holes in their walls because it’s cheap and easy to use–but it won’t hold up against water!
Conclusion
And that’s that! With all these things to consider, it can be hard to tell which is the best wood filler for your needs. The good news is that we have covered most of these topics in depth on our website and in other articles, so if you want more information than this article has given you – head over there now!
Martin Flood
Martin Flood has been working in the construction industry for over 20 years as a general contractor with expertise in remodeling projects that are large or small. He has furthered his career by specializing in epoxy resin flooring, providing excellent service to both commercial and residential clients. Martin’s experience enables him to offer professional advice on how to choose the right type of project based on your needs and budget.
View all posts by Martin Flood →