
Wood filler is used to patch holes and cracks in wood, as well as to smooth out surfaces. It’s often used on cabinets before painting, but there are other uses for it as well. Read on to learn more about filling cabinets with wood filler!
How do you use wood filler before painting?
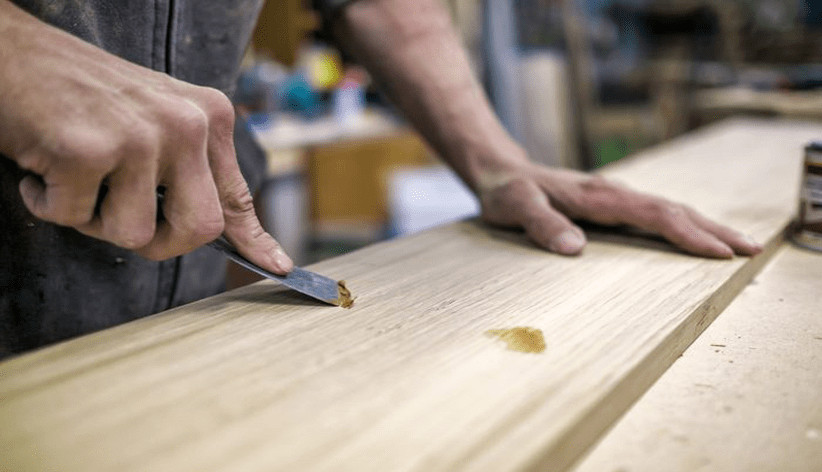
If you are going to use wood filler prior to painting, here are some tips:
- Spread the filler with a plastic putty knife. Don’t try to sand it too soon because it will clog your sandpaper and make it difficult for you to work properly.
- Use a metal scraper or file only if absolutely necessary—they can scratch the surface of your cabinet.
- Don’t use anything abrasive such as sandpaper or steel wool, which can remove more material than necessary and leave scratches on the surface of your cabinets.
Table of Contents
- How do you use wood filler before painting?
- How do you fill cracks in wood cabinets?
- How do you apply grain filler to cabinets?
- Do you need to prime wood filler before painting?
- Why does my filler show through paint?
- How do you smooth wood filler?
- What to use to fill cracks in cabinets?
- What are cabinet filler strips?
How do you fill cracks in wood cabinets?
For light-colored cracks, you can use a putty knife to apply filler once the crack is dry. For dark-colored cracks, it’s best to use an artist’s paintbrush instead of a putty knife as you don’t want any extra color from the wood grain showing through your white filler.
To smooth out any bumps or ridges that may have formed while applying the wood filler, use a wet rag after each layer and sandpaper between layers.
How do you apply grain filler to cabinets?
Now that you’ve sanded a few patches, your cabinet will be in prime shape to receive some filler. In order to apply the grain filler, you’ll need a putty knife and some cloth rags or paper towels.
First, spread a thin layer of grain filler over the entire surface of your cabinets (if they are large items like doors or base cabinets).
Let it dry for about 20 minutes—you can speed up the drying process by placing your cabinet on top of an oven at 200 degrees Fahrenheit for about 10 minutes.
Then remove any excess sanding dust with another pass-through wet/dry sandpaper (or tack cloths). Next, reapply more grain filler and let it dry again. Repeat this process until you have completely filled every nook and cranny of your cabinet!
Now that all those pesky holes are filled with lovely wooden filler, all that remains is smoothing out any imperfections left behind by applying another coat or two (depending on how many coats were originally applied).
Do you need to prime wood filler before painting?
The answer is yes. If you don’t prime your wood filler before painting, the resulting finish will be rough and dull-looking. Priming is especially important if you’re using oil-based paint to cover the filler—oil can’t actually bond with raw wood fibers and soaks into them instead.
That means the surface will be bumpy, chalky, and absorbent even after drying for a few days or weeks (depending on how thickly you applied it).
To prime wood filler: Use an acrylic primer that’s thin enough to penetrate deep into any grooves in your cabinets’ surface; don’t use one that’s too thick or it won’t get through all those spaces properly!
Pay close attention while applying this as well—you need a thin coat just enough to cover everything without dripping down onto other parts of your cabinetry where it shouldn’t go; otherwise when it dries dark spots could appear where there should only be lighter ones from previous coats!
After letting this dry overnight (if possible) apply another coat for better adhesion and coverage before starting on top coats like white paint which won’t stick well unless there are plenty of layers underneath them already.”
Why does my filler show through paint?
If you’re using a filler that is darker than your paint, it will show through. If you use a lighter filler, it will also show through.
If this happens, don’t worry! It’s an easy fix: just get some more wood filler and apply it over the area where the darker or lighter color shows through.
How do you smooth wood filler?
- Sanding
Once the filler is dry, use a sanding block to smooth it out. You can use 220-grit sandpaper to do this. Just lightly run the sandpaper over any rough spots or ridges in your wood filler until they disappear. It should take no more than 10 minutes per door to smooth out all of your fillings if you’re using a block.
If you’re using hand sander bits and don’t have enough control to avoid gouging out too much wood along with your filler, that’s okay! Just make sure not to press down too hard so that you don’t end up removing more than necessary from around each nail hole; just keep light pressure applied at an angle toward yourself as you pass over each area with medium-speed passes on both sides of each hole until it looks like there’s no difference between the two sides (and they aren’t visibly smaller).
What to use to fill cracks in cabinets?
First, you’ll want to know what type of wood filler is best for your needs. There are a variety of different types of wood filler.
Some are better suited for filling cracks and holes in wood cabinets than others. For example, if the crack is very wide or deep, you may need to use a thick grain filler such as “Elmer’s Carpenter’s Wood Filler.”
This particular brand has been around since 1894 and uses only high-quality natural ingredients to ensure that it does not contain VOCs (volatile organic compounds). It also comes in three different sizes: small tube, medium tube, and large tube.
To apply this product correctly, first sand the area where you will be applying your product with an orbital sander so it’s smooth and clean before using any primer or sealer on top of it because otherwise, they won’t stick properly!
Then mix up some Elmer’s epoxy putty according then apply evenly over both sides with a putty knife or similar tool – make sure to fill all cracks completely because otherwise, moisture might get through them later down the road causing further damage!
After letting everything dry overnight carefully sand off any excess material sticking out above surface level – then wipe away any dust particles from previous steps using mineral spirits which can be found next door at Hardware Store #3 near aisle C.”
What are cabinet filler strips?
Cabinet filler strips are used to fill gaps and cracks in cabinets, as well as as a base for countertops. They’re made of wood, plastic, or metal and come in different sizes and colors.
You can find them at your local home improvement store or online. You’ll also find a variety of brands that make them, including Polywood Countertop Edging Strips, CabinetMate Filler Strips, and O-Cedar Wood Filler Tape.
Conclusion
Wood filler is a great way to repair holes in cabinets and make them look new. It’s easy to use, but there are some things you should know about it before using it on your own cabinets.
We hope this article has helped answer some of those questions for you!
Martin Flood
Martin Flood has been working in the construction industry for over 20 years as a general contractor with expertise in remodeling projects that are large or small. He has furthered his career by specializing in epoxy resin flooring, providing excellent service to both commercial and residential clients. Martin’s experience enables him to offer professional advice on how to choose the right type of project based on your needs and budget.
View all posts by Martin Flood →