
Wood filler is a great way to repair any damaged wood in your home. Wood fillers are also very easy to use, but there are some things you should know before starting a project that involves wood filler.
You’ll want to make sure the wood filler will stick well and won’t chip off when touched or scratched. If this sounds like something that might happen on your project, then consider using Everbuild Instant Filler!
What is the best way to apply wood filler?
- Clean the area to be filled. This will give you a better surface for applying the wood filler and ensure that it adheres well.
- Apply the wood filler as soon as possible after mixing. The longer you wait, the harder it is to get an even consistency and your end result may not look quite so good.
- Use a thin layer of filler when first applying it, followed by another if necessary in order to make sure there are no gaps in between any holes or scratches on your furniture piece.* Let dry for a few hours before sanding (at least 3).
Table of Contents
- What is the best way to apply wood filler?
- Can you stain Everbuild wood filler?
- Can I use wood filler without a hardener?
- How do you use a wood filler before painting?
- Can you fill large gaps with wood filler?
- How thick can wood filler be applied?
- How long does Everbuild wood filler take to dry?
- Can you sand one strike filler?
Can you stain Everbuild wood filler?
You can stain wood filler, but it’s better to stain the wood first. A coat of undercoat helps seal the surface and prevents moisture from rotting your project.
Once you have a solid base coat, you can apply your chosen color stain to create a more natural look.
Stain is more durable than paint, so it will last longer on your project—which means less time sanding down those pesky mottled patches!
Unlike paint, staining will not peel or chip off over time because there’s no chemical reaction occurring between the two layers of paint; instead, they’re just sitting next to each other with very little adhesion between them.
Staining also produces far less waste in terms of packaging as compared to using cans of aerosol spray paints which can be bulky when transported or stored in small spaces such as garages and tool sheds where space is limited.
Can I use wood filler without a hardener?
You can use wood filler without a hardener, but it will take longer to dry and you’ll have to sand it twice. You won’t be able to achieve the same smooth finish as if you had used the recommended hardener with your filler.
How do you use a wood filler before painting?
The wood filler can be used on its own or with other products. It can also be applied to surfaces that need more than a simple repair, such as filling in holes and cracks.
To use the wood filler before painting, you’ll need three things: clean dry cloths, an application tool (such as a putty knife), and the product itself.
First off, make sure your surface is completely clean and dry before you begin applying it—you don’t want any dirt or moisture messing up your repair job!
Next, spread some of the filler onto your surface evenly using either a putty knife or other small spatula-like object (but not too much).
If anything gets on top of the wood grain while doing so—for example, if you accidentally swipe too much at once—use sandpaper to lightly remove it before starting again with another coat of filler.
Once all areas have been coated, allow them time to dry fully (usually about 30 minutes) before continuing by adding another layer.
Can you fill large gaps with wood filler?
- Yes, you can fill large gaps with wood filler. You just need to be patient and spread the filler into the gap slowly. A putty knife is useful for this job because it allows you to apply pressure when spreading the filler in order to get rid of air bubbles.
In summary: yes! Just be sure not to fill too much at once or try applying too much pressure, as this will result in an uneven surface finish and may cause your project to crack over time.
How thick can wood filler be applied?
One of the most common questions we get is “how thick should I apply wood filler?” The answer depends on the type of surface you’re working with and what you are hoping to achieve.
- Wood filler can be applied in thin layers or very thick layers, depending on the result you want to achieve. A smooth finish is easier to achieve with a thinner application, while a more textured look requires thicker coverage. For example: if you want to fill cracks in your wall that have been painted over but don’t want them completely gone from sight (because let’s be honest—we all have some old paint jobs that just don’t look great), then this would be an ideal time for a thin layer of wood filler; however, if you’re looking for something thicker and more textured for your project then go ahead and get those fillers ready!
How long does Everbuild wood filler take to dry?
The drying time depends on the thickness of the filler used, but it usually takes 24 hours or longer to dry. You can speed up this process by using a heat gun (or blow dryer) to apply warm air to your wood filler and accelerate its curing process.
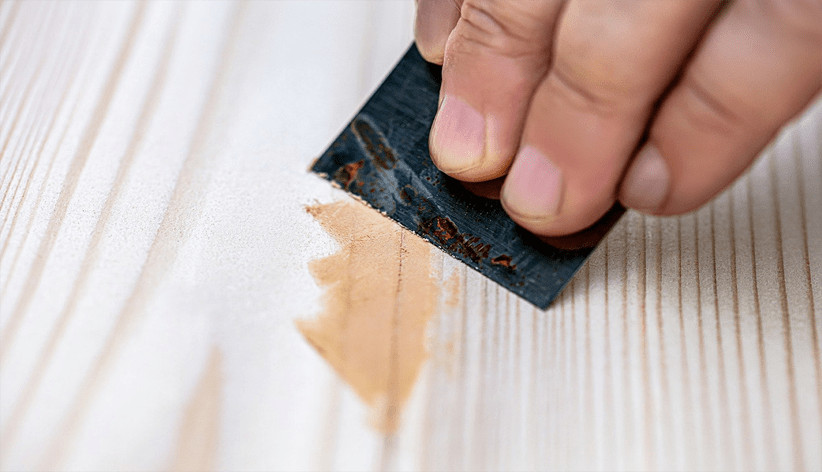
Can you sand one strike filler?
The short answer is yes. You can sand one-strike filler with fine-grit sandpaper and not need to wait for it to dry. However, how long you should wait depends on the type of filler used.
Some are ready for sanding after drying for only a few minutes, while others require several hours or even overnight before they’re ready for sanding.
It’s best to follow the instructions on your specific brand of filler, as each one may vary slightly in its drying times and other specifications.
Conclusion
With careful application, Everbuild wood filler is easy to use and can be sanded after drying. This means that it’s an ideal product for repairs to furniture and other wooden items.
It can also help you create a smooth finish on your project without damaging the surface beneath like paint would do.
Martin Flood
Martin Flood has been working in the construction industry for over 20 years as a general contractor with expertise in remodeling projects that are large or small. He has furthered his career by specializing in epoxy resin flooring, providing excellent service to both commercial and residential clients. Martin’s experience enables him to offer professional advice on how to choose the right type of project based on your needs and budget.
View all posts by Martin Flood →