
So, you’re putting in new hardwood floors and the wood filler’s not the color you want. In fact, it’s not even close. You may be wondering: can I stain wood filler? The short answer is yes!
It might take a few tries before you get it just right but with some patience and practice, you’ll be able to match your flooring perfectly.
Can u stain wood filler?
It’s possible to stain wood filler, but you’ll have to first make sure that it’s safe to do so. If the manufacturer doesn’t provide any specific instructions on application of their product, you should consult a professional before going forward with any project.
Wood filler is designed for use on unfinished wood surfaces—it can be applied over existing paint and stains, as well as bare wood.
If you’re applying it to an old floor that has been painted or stained previously, however, make sure that the surface is clean and dry before proceeding with your project.
Stains come in various shades of brown; dark browns are generally recommended for floors because they tend not to show scratches as much as lighter colors will (and let’s face it: some scratches are just unavoidable).
It’s also important that you choose the right kind of stain: oil-based stains work better than water-based ones because they penetrate deeper into the pores of your flooring material (i.e., they fill them up more).
Table of Contents
- Can u stain wood filler?
- Should wood filler match the wood or stain?
- Can I stain color matched wood filler?
- Can you Colour wood filler?
- How do you make wood filler look like wood?
- How do you hide wood filler?
- Can I sand and stain wood filler?
- How do you stain Minwax wood filler?
- Why is wood filler showing through paint?
Should wood filler match the wood or stain?
- The color of the wood filler should match the wood, not the stain.
- The filler should be a little darker than your floor.
- It should also be more yellow than your floor and more golden in tone.
Can I stain color matched wood filler?
Whether it’s a decorative wood project or something more utilitarian, there are many reasons to fill the cracks and holes in your floor. Unfortunately, you may find that the filler isn’t a perfect match for the rest of your flooring.
If this is the case and you want a more cohesive look in the room, there are several methods that can be used to make sure everything looks uniform. One option is to stain color matched wood filler so they look exactly alike!
How To Stain Color Matched Wood Filler
Staining color-matched wood filler will help create an even surface across your floors as well as any other areas that need filling.
It takes about 3 hours for this process using latex paints and staining tools like brushes or rollers after drying overnight with fans blowing over them all night long (about 8 hours).
After this part has been completed successfully without any major mistakes being made then we move on to our next step which involves painting over top layers with heat lamps because they require less drying time than regular air temperatures would provide us here locally in New Hampshire where I live at least during winter months when rainfall amounts increase dramatically.
Can you Colour wood filler?
You can color wood filler with paint. This is a great option for disguising the filler and making it match the rest of your floor.
However, you will need to choose a paint that matches the existing flooring. You can use latex or oil-based paint for this project, but make sure that you go with a brush rather than rollers so that you don’t leave any excess material on the surface of your woodwork.
How do you make wood filler look like wood?
If you want to make wood filler look like wood, you can use a product that matches the color and grain of the wooden floor.
How do you hide wood filler?
You can use stain to match your wood filler, as well as make it darker or lighter. Staining wood filler is a great way to make the color more natural and realistic.
If you want to darken the wood filler, we recommend using a stain that is darker than what it currently is.
For example, if you have light-colored wood filler but want to make it darker, choose a dark brown or black stain.
For lightening up your color choice, try going with something like an off-white or beige shade of paint instead of straight white or another light tone – this will help keep some depth in there so there’s not too much contrast between your two colors!
Another popular way people go about matching their surfaces is by choosing something similar: for example, if we had red oak floors then we might choose another type of flooring that also has red oak in its composition (like cherry).
This makes sense because both types come from similar kinds of trees so although they won’t look exactly alike at first glance they’ll still feel familiar enough overall! You could also go completely opposite ends here by choosing something completely different like pine instead – which would create even more contrast between these two materials while still achieving similar results visually speaking overall!
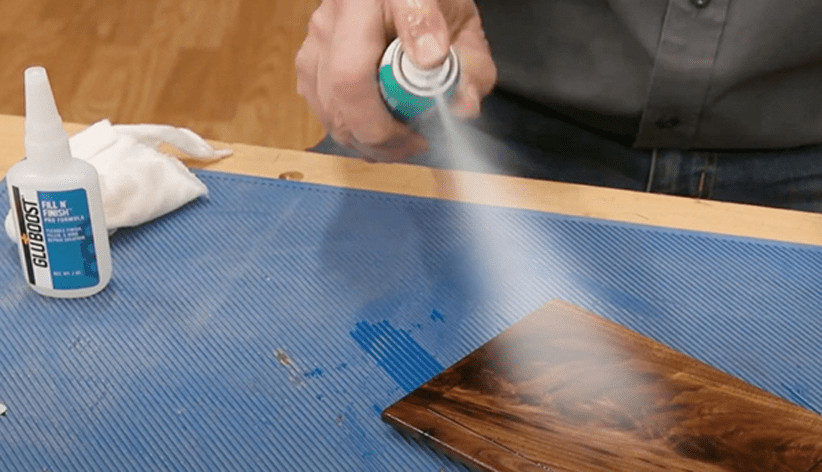
Can I sand and stain wood filler?
Sanding and staining wood filler is not recommended because the filler will scratch and chip easier than bare wood.
There are two options for sanding and staining wood filler: using a high-quality stain or using a gel stain that won’t be able to absorb into the surface well.
Using a high-quality stain like Minwax Jacobean Wood Stain can help make your filler more durable, but it may still be more susceptible to scratches than bare wood.
How do you stain Minwax wood filler?
- Use a foam brush to apply the Minwax stain, then wipe off any excess with a rag.
- Let it dry overnight and sand with fine sandpaper until you’re happy with the result. Repeat this process until you get your desired color (the more coats of stain, the darker it will be).
Why is wood filler showing through paint?
When you paint over wood filler, it will show through because the filler is not a perfect match to the wood. Wood filler is not as smooth as wood, nor is it as hard, durable or strong.
It’s important to keep this in mind when deciding what kind of paint you’re going to use on your project.
Conclusion
The wood filler is a great way to repair areas in your home where you have some damage or need to fix something.
It can be used for many different applications including filling in holes and cracks or adding texture to areas where it looks too smooth.
The main thing that you need to remember when using this product is that it needs time to dry before painting over top of it so make sure that you follow all instructions carefully before beginning any project!
Martin Flood
Martin Flood has been working in the construction industry for over 20 years as a general contractor with expertise in remodeling projects that are large or small. He has furthered his career by specializing in epoxy resin flooring, providing excellent service to both commercial and residential clients. Martin’s experience enables him to offer professional advice on how to choose the right type of project based on your needs and budget.
View all posts by Martin Flood →