
Removing epoxy grout from porcelain tile can be a real pain. The process is long and messy, but luckily we’ve got a pretty easy guide on how to remove it!
How to remove epoxy grout from porcelain tile (overview)
Epoxy grout is a type of grout that is usually used when you want to increase the strength and appearance of your tile.
It can be used in many situations, like around showers or tubs, on walls and floors, and much more. There are two types: non-sanded epoxy and sanded epoxy.
Both have different levels of hardness depending on how much sanding has been done to them.
What You’ll Need:
- A bucket
- Grout removal tool (like a scraper)
- Plastic scraper for any excess residue left behind by your initial scraping process
Table of Contents
- How to remove epoxy grout from porcelain tile (overview)
- Step 1: Clear out all objects and furniture that you don’t need
- Step 2: Cover your work area to share or protect items that are near your working area.
- Step 3: Remove any caulking or silicone around areas where the tiles and frame meet.
- Step 4: Put on protective gear to protect your eyes and skin from chemical damage
- Step 5: Prepare your solution
- Step 6: Start removing the grout from the tile using a scouring pad
- Step 7: Repeat the process as necessary until all of the grout has been removed.
- Step 8: Wipe away any remaining residue with a clean, wet cloth.
- Step 9: Let it dry for at least 24 hours before applying new grout or caulk.
- Removing epoxy grout can be a pain, but we have a pretty easy guide on how to remove it!
Step 1: Clear out all objects and furniture that you don’t need
The first step is to clear out the area where you’ll be working. Remove all objects and furniture that you don’t need.
Make sure you are in a well-ventilated area and wear protective gear—including goggles, long sleeves, and rubber gloves—to keep yourself safe from chemical spills.
Step 2: Cover your work area to share or protect items that are near your working area.
Before applying, cover your work area to share or protect items that are near your working area. If you don’t have a plastic sheet, using a tarp is also an option.
Step 3: Remove any caulking or silicone around areas where the tiles and frame meet.
By now, you should have removed all of the epoxy grout from the area where you want to remove it. The next step is to remove any caulking or silicone around areas where your tiles and frame meet.
This isn’t easy. You might need a scraper or putty knife to remove it—and make sure that you’re removing ALL of it! If not, there will be thin bits here and there that will prevent you from getting good adhesion when we reattach the new grout later on.
Step 4: Put on protective gear to protect your eyes and skin from chemical damage
Once you’ve got your gloves, respirator mask, and protective clothing on, it’s time to get started. Wearing safety shoes is especially important if the grout has hardened and cracked in places; that broken tile can be like a glass shard waiting to slice through your feet.
First, grab a bucket of warm water (not hot or boiling) and add 1 cup of vinegar. Mix well with a clean sponge or dish rag so that all the surfaces are being cleaned at once.
(If there’s no way to reach all sides of the floor at once with your cleaning solution, try using an extension stick.) Rinse thoroughly with clear water before moving on to step 5 below.
Step 5: Prepare your solution
You will need to prepare a solution that is safe for the tile and frames, as well as non-abrasive enough to remove grout without damaging the frame or tile. You’ll also need a soft cloth or sponge.
Step 1: Clean the frame and tiles
Use a soft cloth or sponge to gently wipe away any dust from your frame and tiles before continuing with this step. This will keep any dirt from scratching up your grout removal solution later on in the process.
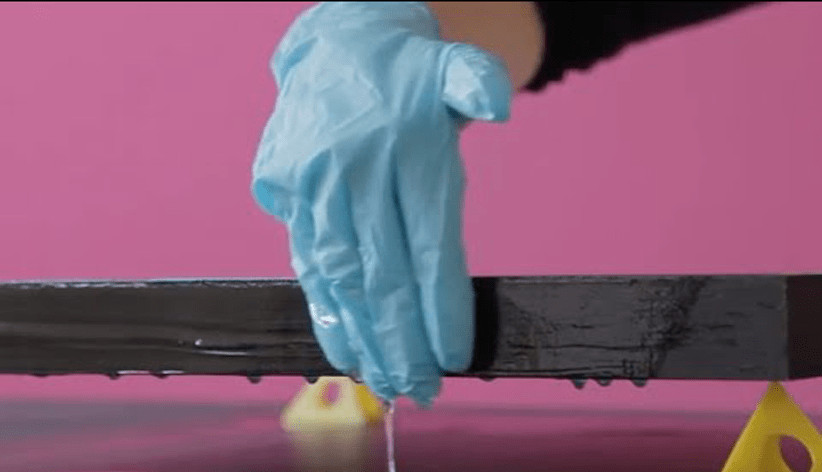
Step 6: Start removing the grout from the tile using a scouring pad
Once you’ve saturated the grout, lift the pad and wipe away any excess water. Then, use firm pressure to begin scrubbing the grout away from the tile.
Don’t bother applying too much pressure at first; just get used to how it feels and then increase your strength as needed.
If you have access to an electric sander, give that a shot before attempting to remove the grout with a scouring pad or other tools.
If all else fails, you can always take your porcelain tile down and replace it with new tiles—but only if your tile is older than five years or has been mistreated by acidic cleaners or harsh chemicals.
Step 7: Repeat the process as necessary until all of the grout has been removed.
Once you’ve removed as much grout as possible, repeat the process until all of it has been removed.
After you’ve finished removing all of the epoxy grout from your porcelain tile, use a scouring pad to remove any remaining residue, and then wipe away any remaining dust with a wet cloth.
Step 8: Wipe away any remaining residue with a clean, wet cloth.
Once you’ve removed all the grout, it’s time to wipe away any remaining residue. Use a clean, wet cloth to do this; don’t use anything dry or abrasive (like steel wool) as it could scratch or damage your tiles.
If there are still a few stubborn clumps of grout left on the surface of your tile, try using a toothbrush dipped in water and scrubbing gently before wiping away with a clean cloth.
Step 9: Let it dry for at least 24 hours before applying new grout or caulk.
- Let it dry for at least 24 hours before applying new grout or caulk.
- You can speed up the process by using a hair dryer, heat gun, and/or blow dryer on a low heat setting.
Removing epoxy grout can be a pain, but we have a pretty easy guide on how to remove it!
Removing epoxy grout can be a pain, but we have a pretty easy guide on how to remove it.
- Don’t rush the process. Take your time and make sure you’re working in small sections at a time.
- Don’t be afraid to get dirty! You’re removing epoxy grout from porcelain tile, so it’s not like this is your fancy white kitchen flooring or something.
- Keep your work area clean by wiping away any dust or debris with cloths as you go along and between steps too – because otherwise, things start getting clogged up with dust/debris in all the wrong places (which leads us right back again).
- Make sure you have all of your tools ready before starting anything: rubber gloves (we recommend being prepared), mask/respirator (because this stuff can irritate eyes), goggles (again with the eyes), dust masks/respirators for yourself and anyone helping out, etc..
Conclusion
After you’ve removed the grout and cleaned the tile, you may notice that some of the glue remains on your tile. You can remove this easily by scraping off any residue with a razor blade or a scraper.
The epoxy will come off quickly when scraped with something sharp enough to cut through it.
Martin Flood
Martin Flood has been working in the construction industry for over 20 years as a general contractor with expertise in remodeling projects that are large or small. He has furthered his career by specializing in epoxy resin flooring, providing excellent service to both commercial and residential clients. Martin’s experience enables him to offer professional advice on how to choose the right type of project based on your needs and budget.
View all posts by Martin Flood →