
you think you’re ready for that weekend project, but then realize your wood filler tube is stuck in the can and won’t come out.
What do you do? Well, don’t fret. Just follow these easy steps and we’ll have this fixed in no time at all:
How do you open a wood filler tube?
You can use a flat screwdriver, a putty knife, pliers, scissors, or nail clippers to open the tube.
If you don’t have any of these items at hand and you’re determined to open the wood filler tube no matter what (you’re not alone!), try using a hammer or even the back of your knife blade.
If all else fails and those methods aren’t working out for you—use your teeth!
Table of Contents
- How do you open a wood filler tube?
- How do you open the Ronseal wood filler tube?
- How do you use a plastic wood tube?
- How do you loosen wood filler?
- How do you open Elmer’s wood filler?
- Are wood putty and wood filler the same?
- How do you use Ronseal Ready Mix wood filler?
- How do you use a two piece wood filler?
How do you open the Ronseal wood filler tube?
To use the wood filler, you’ll first need to remove the cap. Then, squeeze the tube until it fills up with wood filler.
Next, cut off a small portion of your selected area with a knife (or nail clippers) and spread it over the affected area using your putty knife.
How do you use a plastic wood tube?
Now that you know how to open a plastic wood filler tube, how can you use it?
To use a plastic wood filler tube, first, remove the lid by twisting it open with a screwdriver. Then insert the tip of your wooden applicator into the opening in order to reach inside and scoop up some filler.
You can apply this filler directly onto surfaces or by laying down strips of tape in order to create borders or designs. It’s also possible to add color by mixing various shades together before using them on your project.
How do you loosen wood filler?
Once you have applied the wood filler, there are a few different ways to remove any excess. You can use a putty knife or other scraper to scrape off the top layer of filler that has dried on your project.
If you do not want to leave any excess behind, it might be best to use a damp cloth and rub away at it until all of the filler has been removed from your project.
How do you open Elmer’s wood filler?
If you’re new to the art of wood filler, chances are you haven’t had much experience with opening these tubes. It’s not a complicated process, but it can be intimidating if it’s your first time doing it.
So hopefully this little guide will help you out:
- Use a screwdriver (or any similar object) to pry off the lid of the tube. If that doesn’t work, try using a hammer instead! The force of the blow should be enough to break through the glue holding on that pesky lid.
- If all else fails, try cutting through one side of your tube with a knife. This may sound like an extreme measure but sometimes desperate times call for desperate measures and all that jazz! Don’t worry though—once cut into pieces like this, Elmer’s wood filler won’t end up being useless garbage (like some other products we’ve tried). These smaller chunks allow us access not only from top down but also from bottom up as well—so now there’s nothing stopping us from scooping out every last bit left behind inside there too!
Are wood putty and wood filler the same?
- Wood putty and wood filler are not the same things. Putty (or filler) is used to fill gaps and holes, while putty is a liquid that you apply with your finger or a tool like a brush. Fillers are typically available in solid form, but can also be found in powder form if it’s already mixed with water or other liquids. Both types of materials will harden over time and become firm enough to support weight once they dry completely.
- Wood putty is best suited for filling small areas such as nail holes or fine cracks on furniture surfaces; use it when you’re working on an ornate piece of woodwork and don’t want to leave your mark on it after painting or staining it. Also useful for making repairs around windowsills where caulking often fails due to regular exposure to sunlight over time—essentially any place where moisture may cause damage due to repeated exposure over time (especially around doors).
How do you use Ronseal Ready Mix wood filler?
To apply Ronseal Ready Mix wood filler, you will need a putty knife and a flat surface. The first thing to do is to gently remove any loose material or dirt that may be in the damaged area.
Next, apply the filler using your chosen tool.
Be careful not to overfill the hole; you don’t want it overflowing when it dries! Also, remember that you can only use this product in one direction—inward from where it was applied—so keep an eye on how much volume your repair takes up as it dries.
How do you use a two piece wood filler?
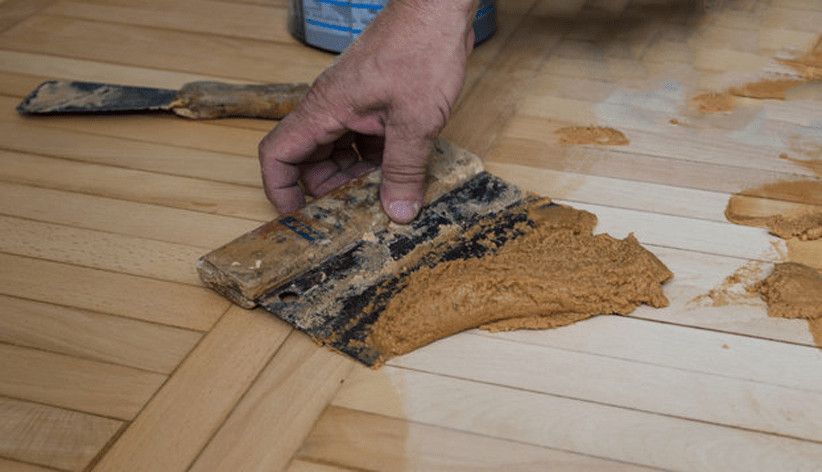
- Use a putty knife to spread the filler over the crack, hole, or another area that you want to fill in.
- Use a wood filler knife to smooth out the excess filler. This will help it dry faster and leave a smoother finish.
- Dampen a sponge with water and use it to wipe off any excess filler on the surface of your project until there are no visible streaks left behind.
- After drying, sand down your piece so that the surface is smooth again, and then apply paint as needed!
Conclusion
Wood filler tubes are great for repairing or covering holes in wood surfaces. You don’t need a lot of experience with them, but knowing how to open one and use it properly is important.
Martin Flood
Martin Flood has been working in the construction industry for over 20 years as a general contractor with expertise in remodeling projects that are large or small. He has furthered his career by specializing in epoxy resin flooring, providing excellent service to both commercial and residential clients. Martin’s experience enables him to offer professional advice on how to choose the right type of project based on your needs and budget.
View all posts by Martin Flood →