
Wood filler is a great way to make minor repairs to your furniture and other wood products. It’s easy to use, and it dries quickly so you don’t have to spend too much time working with it if you’re in a hurry.
Plus it was very inexpensive! But did you know that there are other ways to make wood filler than just going out and buying some?
In this article, we’ll show you how easy it is to make your own homemade sawdust-based wood filler using only two ingredients: sawdust and glue.
What can I mix with sawdust to make wood filler?
Some of the best wood fillers are made using sawdust and glue. This is because the glue will help to seal any holes in the wood, which makes it hard for air to escape through them.
The epoxy that you use should be a two-part type, with the first part being mixed with water at a ratio of one part epoxy to four parts water. You then mix this with your sawdust in equal amounts and place it on top of your patch. Once dry, sand down before applying another coat (and so on).
Epoxies are also great for creating filler material but can be quite expensive if bought from a hardware store or home improvement center.
If you have some leftover epoxy lying around from other projects then this is a great way of repurposing it into something useful rather than throwing it out!
Simply mix up equal amounts of both parts together before adding some sawdust into it; make sure that there’s enough sawdust added so that they blend together well without leaving any clumps behind when finished mixing together all ingredients thoroughly using either hands or a mixing tool such as spatula/scraper tool instead!
Table of Contents
- What can I mix with sawdust to make wood filler?
- How do you make wood filler with wood glue?
- How do you fill gaps with wood glue and sawdust?
- How do you make wood filler with sawdust and epoxy?
- What can be used in place of wood filler?
- Is wood glue and sawdust Stainable?
- Can wood glue be used as wood filler?
- How long does homemade wood filler take to dry?
How do you make wood filler with wood glue?
The ratio of sawdust to wood glue is pretty much a 1:1 ratio. I made my mixture in a container, but you could also mix them on your workbench or even right on the wood. It’s not like it’s going to go anywhere!
Mix up your sawdust and wood glue together with a paintbrush or something similar in size. You can use as little or as much of each substance as you want; just make sure that everything is mixed well so that there are no lumps or pockets of one material over another.
How do you fill gaps with wood glue and sawdust?
The first thing to do is fill the gap with sawdust and glue. Use a putty knife or similar tool to push the mixture into the gap, then wipe away any excess with a damp cloth.
Let it dry for at least 24 hours before sanding it down smoothly with a sanding block or similar tool.
Finally, you can use a paintbrush to apply additional coats of wood filler as needed.
How do you make wood filler with sawdust and epoxy?
In order to mix sawdust with epoxy, you’ll need a putty knife and a mixing container. You can use any kind of container, but something with high sides will make things easier.
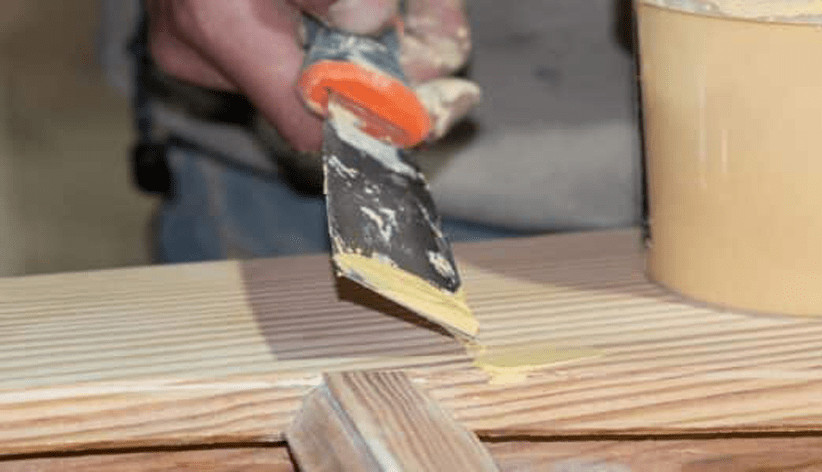
To apply the wood filler, just scoop some out of your mixing container and use the putty knife to spread it evenly over the damaged area in your piece of furniture.
Try not to get too much on your piece at once—you don’t want it dripping down and making a mess! If there’s excess around the edges of your repair area, simply use another tool such as an ice scraper or something similar (be careful not to scratch anything) to scrape off any extra filler so that it’s flush against your furniture piece again.
Once you’ve finished applying all of your wood filler material and smoothing out any air bubbles underneath its surface (which may require sanding), then let everything dry overnight before removing all traces of wetness from both surfaces involved (use rags soaked in alcohol).
What can be used in place of wood filler?
When it comes to filling holes, you have a lot of options. The easiest way is with wood filler, but there are other types that can also be used effectively.
- When choosing a filler for your project, make sure it’s designed specifically for the wood you’re working with. Some fillers aren’t strong enough or they don’t match the color and grain of your wood well enough; others might be too thick or hard to sand down afterward.
- Also, consider whether you’ll need something that’s easy to clean up after being smoothed into place. If so, you may want to choose something like Elmer’s Wood Glue (which can be found at most craft stores) instead of regular white glue because it won’t leave any sticky residue behind in case there are any spills onto your floor or furniture during application!
Is wood glue and sawdust Stainable?
When your wood filler has dried it should be strong enough to handle the stress of being sanded. If you don’t want to wait and want to get on with your project, you can stain or paint the wood filler as soon as it dries.
However, if you’re patient and have time to wait, let the wood filler cure for at least 24 hours before applying any more coats of finish.
The longer you wait before applying a coat of finish over new wood filler, the stronger it will be when applied (and less likely to chip).
Can wood glue be used as wood filler?
Wood glue can be used as wood filler, but it’s not the best choice. Wood glue will dry more slowly than wood filler, so you need to be careful when filling large gaps.
Because of this, we recommend using a different type of filler if your project requires fast drying time or if you are working on a small scale and have access to other fillers.
However, there are some instances in which using wood glue as a filler is beneficial:
- It’s cheaper than other fillers and easier to find at hardware stores or craft stores
- The dried product will appear smoother than most commercial fillers (though it won’t look quite as nice as polyurethane)
How long does homemade wood filler take to dry?
You’ll have to wait for the wood filler to dry. The time varies depending on what material you’re using, and whether or not it has been pre-soaked in water.
If you’re using sawdust and glue as your base, then that’s what will determine how long it takes for the mixture to dry.
If you add more sawdust into the mixture, then it takes longer to dry than if you add less sawdust or none at all.
The same goes for applying more glue—the more glue you put in there, the faster your wood filler will be ready!
It also matters how much moisture is already in the wood before adding any filler material. For example: if there was no moisture present originally but now there is some due to rain or humidity levels rising throughout summer months (and especially during monsoon season) then drying times may increase dramatically as well.”
Conclusion
That’s it! Now you have the basics of how to make wood filler out of sawdust and glue. Using this method is simple, fast, cost-effective, and produces a professional-grade product that will last for years.
The best part is that you can use any kind of sawdust as long as it contains no waxes or oils so almost every type will work just fine!
Martin Flood
Martin Flood has been working in the construction industry for over 20 years as a general contractor with expertise in remodeling projects that are large or small. He has furthered his career by specializing in epoxy resin flooring, providing excellent service to both commercial and residential clients. Martin’s experience enables him to offer professional advice on how to choose the right type of project based on your needs and budget.
View all posts by Martin Flood →