
If you’ve ever tried to repair a damaged board in your house, you may have noticed that store-bought wood filler doesn’t look very natural. It’s not hard to fix this problem, though—with the right tools and materials, you can make your own filler that looks just like real wood.
How to make wood filler look like wood grain
Here’s how to make wood filler look like wood grain:
- Apply a thin layer of wood filler with a putty knife.
- Let it dry until it’s firm to the touch but not hard, about 20 minutes (check the package for specific drying times). Sand off anything that protrudes past the surface of the board and repeats Step 1 as needed until you achieve your desired consistency and appearance, being careful not to sand too much if you want an even finish.
Table of Contents
- How to make wood filler look like wood grain
- The first step is to sand the wood to remove any debris and old finish.
- The goal is for the wood filler to blend in with the natural wood grain.
- Pick out the right type of wood filler
- Use a putty knife to apply a thin layer of filler.
- Each patch should be slightly larger than the hole you’re filling.
- Let it dry until it’s firm to the touch but not hard.
- Sand off anything that protrudes past the surface of the board.
- A speed square comes in handy, so you don’t break through the paper and gouge your work on an unseen nail or staple in the floor.”
- It’s also important that you use fine-grit (120 or higher) sandpaper because coarser grits can create tiny grooves that will show up when you stain or paint your boards.
- Then, use a damp cloth to wipe away any debris from sanding.”
- With persistence and patience, you can make your own wood filler look as good as new!
The first step is to sand the wood to remove any debris and old finish.
You’ll want to sand the wood to remove any debris and old finish. Use a damp cloth to wipe away any dust or debris. If there’s paint or stain on the wood, use a circular motion with a sanding sponge to remove it. Avoid gouging into the wood by using light pressure when moving across its surface using both hands, one on top of the other, with your palms facing down.
Next, use an orbital sander with 100-grit paper to smooth out all of your scratches from your previous step. Use medium pressure and make sure you’re staying parallel with each stroke as you go along so that you don’t end up creating big gaps in your finish (which are visible as swirl marks).
The goal is for the wood filler to blend in with the natural wood grain.
To achieve a seamless finish, you’ll want to apply a thin layer of wood filler to your project. This will fill small holes left behind by knots and cracks in the wood while blending in with any remaining grain.
After applying the filler, let it dry until it’s firm to the touch but not hard—if it gets too hard before you sand it down, use warm water or mineral spirits (paint thinner) to soften it up again so that you can continue working with it.
Sand off anything that protrudes past the surface of the board using medium-grit sandpaper until there is nothing left sticking out past the top layer. Then wipe away any debris from sanding with a damp cloth and give yourself a pat on the back for doing such an excellent job!
Pick out the right type of wood filler
There are several different types of wood filler, each with its own advantages and disadvantages. The most common is polyurethane-based filler, which you can find at your local hardware store. You can also find epoxy-based fillers that are more durable than polyurethane fillers, but they’re significantly more expensive. If you want to avoid using wood filler altogether (and who wouldn’t?), there’s always the option of repurposing an old piece of furniture as a shelf!
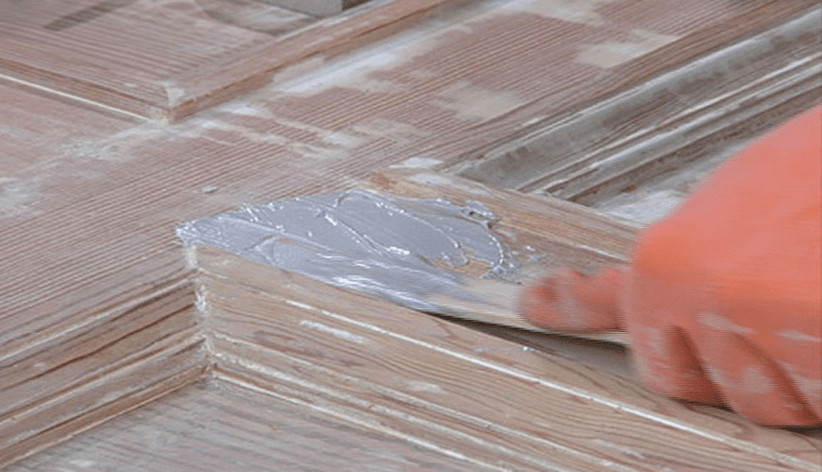
Use a putty knife to apply a thin layer of filler.
To begin, use a putty knife to spread a thin layer of wood filler over the entire surface.
Each patch should be slightly larger than the hole you’re filling.
The first step in making your filler look like wood is to make sure that each patch you use is slightly larger than the hole it will be filling. This will allow you to sand down the edges of your filler so that they blend into the surrounding wood.
When using wood filler on an actual project, it’s important not to make your patch too small, or else it may become visible after you’ve finished painting or staining over it.
Let it dry until it’s firm to the touch but not hard.
I like to let it dry for a few hours, but you’ll want to be careful not to let it dry too long or too quickly. If you leave it on too long, the filler will become hard and brittle. If you don’t give it enough time and your filler starts turning gray in patches, then it’s dried out—and you won’t be able to use that patching mud anymore!
Sand off anything that protrudes past the surface of the board.
Use a speed square to check for level. This will help you get an idea of how much filler needs to be applied and where it needs to go. If you’re not sure, take a damp cloth and wipe away any debris from the sanding process. Use fine-grit sandpaper with a sanding block or hand-sanding block until the surface is smooth and even.
Using your putty knife, apply a thin layer of wood filler over any holes or gaps in the wood grain as well as other areas that need repairs. Let it dry until it’s firm to the touch but not hard (about 24 hours).
A speed square comes in handy, so you don’t break through the paper and gouge your work on an unseen nail or staple in the floor.”
A speed square comes in handy, so you don’t break through the paper and gouge your work on an unseen nail or staple in the floor.
A quick tip: If you happen to have a speed square handy, great! But if not, try using a piece of cardboard with one side taped at 90 degrees (perpendicular) to another side. This works just as well!
It’s also important that you use fine-grit (120 or higher) sandpaper because coarser grits can create tiny grooves that will show up when you stain or paint your boards.
It’s also important that you use fine-grit (120 or higher) sandpaper because coarser grits can create tiny grooves that will show up when you stain or paint your boards. Once the wood filler has dried completely, lightly sand the surface with fine-grit sandpaper. This will help to level and smooth out the surface so that it is ready for staining and painting.
The general rule of thumb is: if the items are really large and thick, use a low grit like 80; smaller items with more detail should be done with a high grit like 220. Again, always make sure to test on scrap wood first!
Sanding doesn’t just remove damaged areas of your piece; it also removes dirt particles and other debris from previous coats of paint or stain so they don’t show up later on when you finish your project! Be sure to use a damp cloth after each pass of sanding in order to absorb any dust particles produced during this process (this prevents them from getting embedded into later coats).
Then, use a damp cloth to wipe away any debris from sanding.”
Your wood filler should come with instructions, but if it doesn’t, there are two common ways to apply the stuff. The first is to use a sanding sponge or putty knife. You want to get the sanding sponge slightly and then use it like an eraser; you’ll need to reapply water as you go along if your filler dries out too quickly. The other method is to spread it on with your hands or a tool that has been dipped into the water—I’ve used an old spoon for this purpose many times!
When you’re done, wipe away any debris from sanding with a damp cloth.”
With persistence and patience, you can make your own wood filler look as good as new!
Wood filler is a great tool for covering up small holes and scratches in wood. It’s also much cheaper than replacing an entire board of wood, and it’s easy to use.
The trickiest part of using wood filler is getting the color just right. The best way to do this is by mixing your own shades with different colors of paint or stain until you get exactly what you want.
You can use this technique on furniture, walls, or floors, so long as they’re made out of wood! Just be sure not to use too much pressure when applying it; otherwise, you’ll end up with an uneven surface instead of nice grain lines like those found in real wood grain!
Conclusion
With persistence and patience, you can make your own wood filler look as good as new!
Martin Flood
Martin Flood has been working in the construction industry for over 20 years as a general contractor with expertise in remodeling projects that are large or small. He has furthered his career by specializing in epoxy resin flooring, providing excellent service to both commercial and residential clients. Martin’s experience enables him to offer professional advice on how to choose the right type of project based on your needs and budget.
View all posts by Martin Flood →