
Marble countertops are expensive and difficult to keep clean, so if you want the look but not the hassle, consider epoxy-coated countertops.
They’re durable and easy to clean and they come in a range of colors that mimic marble’s natural beauty.
However, many people think of epoxy as something only contractors use to seal concrete floors and driveways.
In reality, it’s an ideal choice for kitchen counters because it can be tinted with pigments so you can get exactly the color you want.
If you’re looking for cheap ways to cover up your old linoleum or laminate countertop (or just want to spruce up your kitchen), we’ll show you all about how to do marble epoxy countertops step by step!
How do you make marble effect countertops?
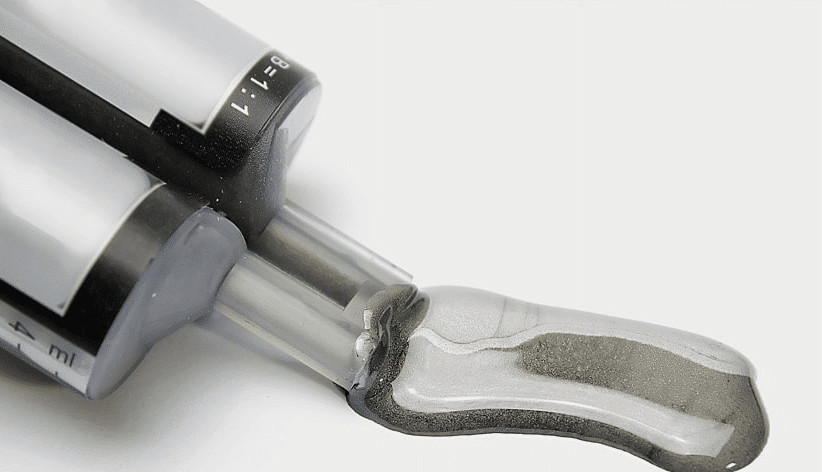
- Step 1: Mix your epoxy.
- Step 2: Pour the epoxy into a paint tray and stir it until it’s well-mixed.
- Step 3: Spread the epoxy on your countertop with a roller, making sure to cover all areas of the countertop.
- Step 4: Wait for the concrete to dry (it will be hard when it’s done). If you place something heavy on them while they’re wet, they’ll crack! So don’t do that! Instead let them dry completely before using them as a base for your marble effect color coatings/sealers/etc., which we’ll get into next week when we talk about actually mixing up these different colors and finishes–so keep coming back!
Table of Contents
- How do you make marble effect countertops?
- How do you epoxy countertops step by step?
- How do you refinish countertops to look like marble?
- How do you epoxy a table to look like marble?
- How do you make a faux marble finish?
- How do you make fake marble?
- How many coats of epoxy do you need for a countertop?
- What primer should I use for epoxy countertops?
How do you epoxy countertops step by step?
There are many ways to epoxy a countertop, but the most important thing is that you follow all of the steps. The following is a guide to doing an epoxy countertop in 5 easy steps:
- Clean and sand the countertops. You will want to use 80 grit sandpaper to clean up any residue or debris on your countertops. This will help give you a smooth surface for applying the epoxy later on.
- Apply two coats of epoxy with a roller applicator, letting each layer cure overnight before adding another coat if needed. Make sure you read through our post on how much product you need so that you don’t run out midway through application!
- Apply your sealer with a paintbrush after letting each layer cure overnight as well (you can see more about this step here). Let this dry for 2 hours before applying topcoat with a paintbrush and letting it dry overnight once again (again, see more about this step here). Finally, apply another layer of topcoat over everything else for extra protection against water damage—this should only take about 15 minutes!
How do you refinish countertops to look like marble?
Marble is a more durable material than granite, but unlike granite, it cannot be sanded and resurfaced. The best way to remove stains from marble is by using a marble grout sealer.
This product should be applied with a brush on all sides of the stone (including the top and bottom).
How do you epoxy a table to look like marble?
Marble effect epoxy is a two-part resin that can be used to create the look of marble. To apply the epoxy, you will need:
- A mixing container (like a plastic mixing bowl)
- A stir stick (like a popsicle stick)
- An application knife (like a steak knife)
This guide is going to walk you through each step in detail so that you don’t make any mistakes when applying your product!
How do you make a faux marble finish?
Now that you’ve got your countertop ready to go, it’s time to paint. First, make sure all of the surfaces are clean and dry.
If there are any holes or cracks in the countertop, mop up any liquid with a cloth or sponge and let it dry before moving on.
Next, decide how you want to apply the paint. You can use a roller or brush, but we recommend using a sponge for best results:
- If using a roller: Roll over each section of marble until smooth and even (it will look streaky at first). Then wait one hour for it to dry before going over it again with an additional coat of paint if necessary; this will help cover up those streaks while also creating an even finish on top of your faux marble surface instead of leaving them visible as they were before applying more coats onto your project area where they could still show through later down the line when everything is said and done!
- If using brushes: Use two different shades (one lighter than another) side-by-side so that they work together instead of against each other so
How do you make fake marble?
Make your own faux marble! How do you make fake marble? It’s easy—just use a concrete sealer.
You can also use a marble or granite sealer.
Another option is to use a marble or granite paint that looks like real stone, but it won’t last as long as an epoxy coating like the one we recommend below for the durability and longevity of your new countertops.
If you want to use these kinds of paints, we recommend doing so on walls rather than counters because they’re not as durable or resistant to stains.
Other options include using epoxy (which requires mixing two separate components before applying), vinyl flooring (which doesn’t actually look like real stone), and vinyl tile (which has some variance in appearance depending on how it’s been cut).
How many coats of epoxy do you need for a countertop?
- One coat of epoxy primer.
- Two or three coats of epoxy.
- Four or five coats of epoxy.
- Six or seven coats of epoxy (this is the maximum recommended).
What primer should I use for epoxy countertops?
To get the best results, use a primer made specifically for epoxy. Primers are designed to adhere well to the various surfaces you’ll be incorporating into your countertop project.
If you’re using a paintable epoxy, look for one that is also compatible with the countertop material(s) you’re using.
Most primers are compatible with all different types of paint as well, so this isn’t something you need to worry about unless your project involves multiple coats of paint on top of each other (like painting over an existing finish).
Conclusion
Did you enjoy this post on how to do marble epoxy countertops? If so, please share it! We hope that it helped you learn something new and gave you some great ideas for your own DIY project.
If there’s anything else we can help with, don’t hesitate to contact us at any time.
Martin Flood
Martin Flood has been working in the construction industry for over 20 years as a general contractor with expertise in remodeling projects that are large or small. He has furthered his career by specializing in epoxy resin flooring, providing excellent service to both commercial and residential clients. Martin’s experience enables him to offer professional advice on how to choose the right type of project based on your needs and budget.
View all posts by Martin Flood →