
Wood filler is a fast and easy way to fill holes in wood. It can be sanded, stained, and painted over. However, if you use a colored filler and then a dark stain or paint on top of it, you may be able to see the filler through the stain.
This is because many types of wood filler are opaque and won’t allow any light to pass through them once they’ve hardened completely (which takes about 24 hours).
In the rest of this post I’ll discuss how much wood filler shows through stain depending on the type used (clear vs white) as well as what other factors influence this outcome such as how thickly you apply your fillers as well as whether or not you have used primer under it!
Can you see wood filler through stain?
Can you see wood filler through stain? Yes.
What causes wood filler to show through stain? Wood filler is a cheaper alternative to replacing the entire piece of wood, so it typically shows up as a lighter color than the rest of the wood in your cabinets or furniture.
This can be fixed by applying an oil-based stain over it that will not penetrate into the pores of the wood, but instead only sits on top of them.
It will also help if you apply multiple coats with sanding in between each coat so that any imperfections won’t be noticeable.
How do I make my wood filler look natural? Use an oil-based stain instead of water-based or latex paint since they will fill voids better than other types and give off more natural-looking results when applied over something like hardwood flooring (which has many small crevices).
Table of Contents
- Can you see wood filler through stain?
- How do I get wood filler to not show stain?
- How does wood filler look stained?
- Why is wood filler showing through paint?
- How do you make wood filler look natural?
- How do you blend wood filler stains?
- Do you use wood filler before or after sanding?
- Can I sand and stain wood filler?
How do I get wood filler to not show stain?
- Use stain-grade wood filler.
- Select a wood filler that is the same color as the wood you’re filling.
- Select a wood filler that isn’t too thick, or you won’t be able to sand it smooth after application.
- If possible, select a filler that’s also not too dark (as opposed to lighter) than your current stain — especially if you don’t want to repaint afterward!
How does wood filler look stained?
When you’re working with wood filler, it’s important to remember that it will show through any stain you put on top of it.
So if you’re going for a dark color, the area where there’s no stain won’t be as dark as the areas that have been stained.
The same is true for lighter colors: they’ll show through less than darker ones. You can use this to your advantage if you want some variation in your piece or if you want to emphasize certain parts of it and make them stand out more than others.
So how do I know how much stain should go where? Well, first off: do not use water-based stains! These tend not only to dry faster but also not adhere well enough so they might just flake off when they get wet (which happens all too often).
So what kind of paint should I use instead? Oil-based paints are best because they take longer to dry and don’t need primer first; however, keep in mind that oil-based paints are not 100% waterproof so water spots may still appear after washing dishes with soap residue on them, etc…
Why is wood filler showing through paint?
If you’re using wood filler, it’s because there’s a crack or hole in your wood. Wood is a natural product and can be susceptible to dings, dents, and cracks.
In some cases, these flaws are beyond repair and will require replacing the piece of furniture. But if it’s just a small chip or nick that’s causing the problem (as opposed to a big gaping hole), you might be able to fix it yourself with a little bit of sandpaper and some paintable wood filler.
In most cases though—no matter how careful you are—you’ll end up with a small spot where the stain shows through your finish on top of the filler. This is especially common in darker-colored woods where it can be difficult to match exactly what was there before since they tend not to show all their flaws quite as obviously as lighter-colored ones do!
Wood fillers expand when they dry out which means any gaps between two pieces will shrink slightly over time making them less noticeable but also leaving us with an ugly white line along our edges after we’ve finished staining them again (or just one really bad job).
How do you make wood filler look natural?
Use a stain with a little orange in it, brown, red, yellow, or green.
The key is to find the color that most closely matches the tone of your filler. You can do this by testing out different stains on scrap wood until you find one that looks natural.
Once you’ve chosen your color and have applied it to your project, let it dry for several hours before sanding off any excess product and applying polyurethane or varnish to protect the surface of your piece.
How do you blend wood filler stains?
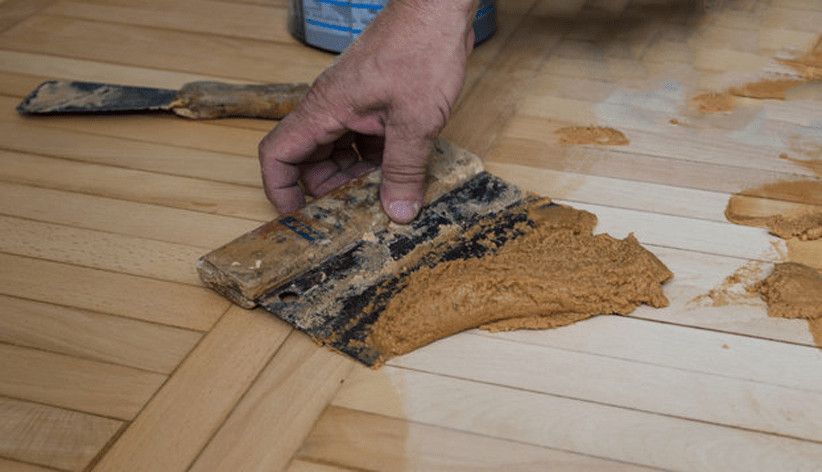
When applying wood filler stain, the first thing you’ll want to do is smooth out any rough patches with a putty knife. Next, wipe off any excess filler with a clean cloth.
A brush will help ensure even application of stain on your project. This means using light strokes and keeping the bristles parallel to the wood grain when brushing over larger areas like table tops or cabinet doors as opposed to vertical surfaces like door frames or crown molding where you can apply horizontal strokes for even coverage of color across each surface area.
Allow your project to dry completely before starting another coat of stain; this will prevent uneven coloring from showing through later on in the process and make sure that none of it soaks into any unseen spaces within your work piece’s surface area that would otherwise absorb liquid material such as paint or varnish once applied in layers during subsequent applications later down line (but if they’re not dry yet then they might get stained too much by applying too many initial coats).
Do you use wood filler before or after sanding?
SAND FIRST, THEN APPLY FILLER:
- Sand to remove any loose paint or finish.
- Fill the cracks with a stainable wood filler and allow it to dry.
SAND AFTER, THEN APPLY FILLER:
- Sand down the surface of any rough areas that were not filled from the first step.
- Apply more filler where needed and allow it to dry.
Can I sand and stain wood filler?
Yes, you can sand and stain wood filler. Sand the surface before staining the wood to make sure that the filler is smooth and even.
Use a sanding block to avoid gouging the wood surface. Use fine grit sandpaper, typically between 120-150 in number (higher numbers mean coarser). Don’t apply too much pressure as this can cause unevenness in your finished product!
To get a nice smooth finish on your project, use an orbital sander with 100 grit paper on it; this will help create a smooth surface after you’ve applied all of your stain layers.
Be careful not to go too deep into the wood or else you may end up with dings and divots in your final product!
Conclusion
Wood filler is a great way to repair or update the look of your furniture. It can be used to fill cracks in wood, fill holes left behind by old hardware and even make furniture look new again! You can use it on nearly any type of furniture using the same basic steps: apply it with a putty knife or similar tool and then smooth it out with fine sandpaper once dry. If you’re worried about your stain showing through when applying filler, we recommend applying a coat of primer before applying the wood filler and topcoat after so that when finished with primer coat there will be no color difference between surfaces before application
Martin Flood
Martin Flood has been working in the construction industry for over 20 years as a general contractor with expertise in remodeling projects that are large or small. He has furthered his career by specializing in epoxy resin flooring, providing excellent service to both commercial and residential clients. Martin’s experience enables him to offer professional advice on how to choose the right type of project based on your needs and budget.
View all posts by Martin Flood →