
Wood filler is a great product for filling in cracks and holes. It’s a great way to repair the surface of your wood, but there are some things you need to know before applying it.
If you don’t prepare properly or use the right technique, your project can end up looking worse than before! With that in mind, here are some common questions about wood filler:
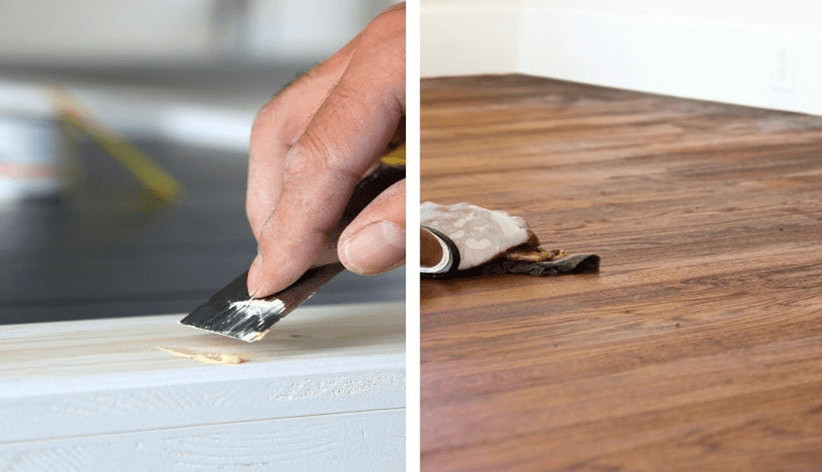
Do you use wood filler before or after staining?
If you’re filling a large hole, it’s best to stain first. This way, you can see if the wood filler was applied evenly and then sand it down before applying an even coat of stain.
If you apply stain first and then fill in your hole, there will be no way of knowing if your wood filler is going to blend with the rest of your project or look like dried mud that has been splattered across your piece.
If you are filling a small hole (less than 1/8-inch), it’s possible to do both steps at once: apply wood filler and then immediately stain over it.
If this is what you want to do, make sure that all sides are coated before letting the glue dry completely so that there are no spots left uncovered by a stain.
Table of Contents
- Do you use wood filler before or after staining?
- How do I get a smooth finish with wood filler?
- How many coats of wood filler do I need?
- How long do you leave fillers before sanding?
- How do you make wood filler not noticeable?
- Why is wood filler showing through paint?
- Should you sand before filling holes?
- How big of a gap can wood filler fill?
How do I get a smooth finish with wood filler?
If you’re applying the wood filler by hand, use a putty knife to apply it. Use the putty knife to smooth out any indentations and ridges from your sanding process.
Then, take a sanding sponge and wipe away excess wood filler until you have a smooth finish. You may need to repeat this step several times for best results.
If you’d rather not use your hands at all, try using an orbital sander instead of using sandpaper or other tools on every surface.
This method is fast but can get messy so be sure to wear gloves! If you do decide to use an orbital sander (or any type of power tool), make sure that only one person is operating the tool at once: safety first!
How many coats of wood filler do I need?
It depends on how many coats you need. If you’re just filling in a small gouge or hole, then one coat of caulking compound will probably cover it.
If the damage is more substantial and requires more filler, then two or three coats of filler should do the trick.
If you find yourself needing three or more coats of wood filler, consider sanding between each layer to create a smoother surface that’s easier to coat with your next layer of compound (you can also spray on an acrylic sanding sealer).
How long do you leave fillers before sanding?
Once you’ve applied the filler, there are some things to consider before sanding. The main thing is that you don’t want to sand it before it’s dry.
In fact, it’s better not to sand at all until the filler has hardened completely because any little fracture or crack can be amplified through additional sanding and this will make your repair look really bad!
If you wait too long after applying the filler before you start applying a final coat of paint or stain (or even just clear coating), then it becomes harder for those materials to adhere properly and they may end up flaking off later on down the road.
This can be prevented by ensuring that everything dries thoroughly between coats – let at least 24 hours pass between each step of your project so everything has time enough for proper curing.
How do you make wood filler not noticeable?
- If you choose to use dark wood filler, it’s best to use a darker stain color. This will make the repaired area much less noticeable.
- You can also choose a filler that is the same color as your wood and then stain your piece before you sand it, or you could choose a lighter-colored filler like light oak or pine and then stain your piece after sanding.
Why is wood filler showing through paint?
If your wood filler is showing through the paint, it’s likely because of one of these reasons:
- The wood was not sanded well enough.
- You didn’t apply a good layer of primer before applying the paint.
- You used the wrong type of filler for the job at hand.
For example, if you were working on a piece where you needed to fill in deep gouges or holes, using regular wood filler would not be an ideal choice because it’s not as thick as other types of fillers and won’t bond well with them either!
Instead, opt for one that has more body and adhesion properties such as Bondo or even epoxy putty (for very large holes).
Should you sand before filling holes?
If you sand before applying filler, the filler may be more noticeable in the finished product. If you sand after filling, it will be less noticeable.
However, if you sand before filling, then you will have to fill again if there are any gaps or holes in your project.
If you sand after filling and then notice a small gap or hole in your project, it may be too late because once dried and hardened, wood filler is not easily removed without damaging the surrounding area of your furniture piece.
How big of a gap can wood filler fill?
The answer to this question depends on a few factors. The size of the gap is one such factor: if you have a small gap, wood filler can fill it and make it disappear almost completely.
A larger gap will require more filler to fill in, making it less likely that you’ll be able to disguise the fact that there was ever a hole there at all.
Another thing that affects how much wood filler will fill up your gap is what kind of wood you’re working with; softer woods like pine and cedar can sometimes absorb more material than harder ones like oak and maple, so they’re easier to cover up when using wood filler.
Finally, how long you leave your wood filler before sanding it down depends on what kind of finish (if any) you want on top of your project—you need longer drying times for varnishes than for stains or paint!
Conclusion
It’s always best to sand before filling, but if you don’t have time for that, it won’t be the end of the world. Just make sure you choose the right filler for your project and use it correctly!
Also, remember that you can always sand down any excess filler later on if needed.
Martin Flood
Martin Flood has been working in the construction industry for over 20 years as a general contractor with expertise in remodeling projects that are large or small. He has furthered his career by specializing in epoxy resin flooring, providing excellent service to both commercial and residential clients. Martin’s experience enables him to offer professional advice on how to choose the right type of project based on your needs and budget.
View all posts by Martin Flood →