
So you’ve got a paint job that needs to be fixed, and you’re wondering: should I use a wood filler before or after staining? Well, the answer depends on your specific problem.
For example, if there are cracks in your wood, then it’s best to fill them before staining. However, if the paint is just chipping off the surface of the wood without any cracks or chips in it then stain first and then fill any areas where the stain didn’t cover well enough with wood filler afterward.
Can you use wood filler after staining?
Yes, you can definitely use wood filler after staining. However, if you make the mistake of getting it on your new stain, don’t panic! You just need to wipe it off as soon as possible.
Conversely, if you want to get wood filler onto a recently-stained piece of furniture (which isn’t necessarily recommended), simply apply a thin layer and let it dry before sealing with another coat of varnish or lacquer.
Table of Contents
- Can you use wood filler after staining?
- How do you use wood filler before staining?
- Should I fill cracks in wood before staining?
- Do you use a wood filler before or after sanding?
- Can you stain over filler?
- How do you fix blotchy wood stains?
- Is wood filler necessary?
- How long should wood filler dry before sanding?
How do you use wood filler before staining?
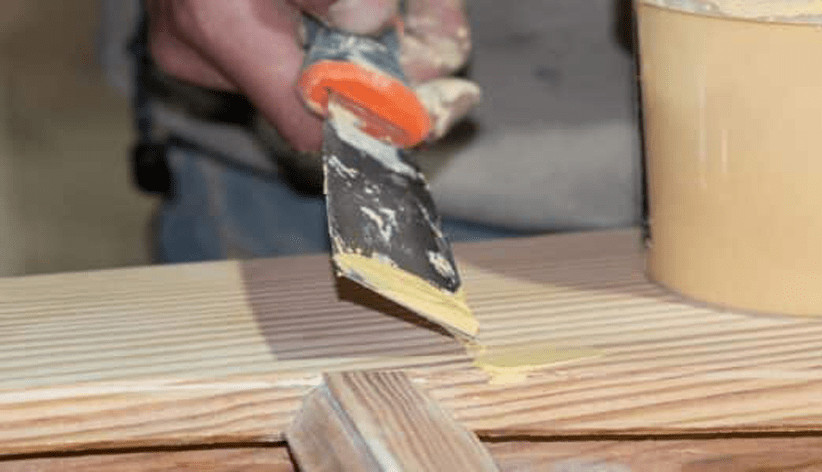
To use wood filler before staining, you’ll need a putty knife and a damp rag. Apply the filler to the crack and smooth it out with your wet rag. Let dry for 24 hours, then sand it down before applying stain.
Should I fill cracks in wood before staining?
Filling cracks before staining is something that many people do. The idea is that filling the crack with wood filler will make the stain go straight into the crack and not around it, giving you a smooth finish on your woodwork.
However, this doesn’t work as well as you might think, especially when you consider how thin or thick your fillers are going to be.
If your filler is thin (like a spackling paste), then all of the excesses can easily be sanded off after staining. However, if your filler is thick (like putty), then there’s no way for it not to go everywhere except in those pesky little cracks!
Do you use a wood filler before or after sanding?
- Apply small amounts of wood filler to the damaged area.
- With your finger, smooth the wood filler into the gap and over the edges of the hole.
- Let it dry for about an hour or until tacky (it will feel slightly sticky). Cooler temperatures will cause more drying time.
- Apply another thin layer of wood filler on top of the existing repair material using a putty knife or trowel.
Can you stain over filler?
You can stain over filler; it will just be really hard to do a good job. Fillers are designed to fill in the gaps between wood fibers, not smooth out the surface. That means that you’ll likely see some imperfections in the stain after you apply it.
If you want to stain over your filler, sanding will help cover up those imperfections so that they don’t show through your final coat of varnish or polyurethane (which is what most of us use). Wipe off any dust and let the surface dry before applying another coat of finish—if you wait too long, moisture from the wood can ruin your work!
That’s also why I recommend doing as much prep work as possible before filling any areas with wood filler—you’ll get better results if there’s less unevenness on your surface for stains and paints to hide later on down the road.
You may also want to consider using a different type of product instead of traditional wood fillers if this bothers you enough—it might be worth investing in some polyurethanes instead!
How do you fix blotchy wood stains?
If you’ve used a wood stain that’s left blotches on your wood, it may be time to reapply the stain. But how do you know which type of stain to use? Here are some tips:
- Use a stain that has a built-in primer. If your wood is soft or prone to scratches and dents, look for stains that come with a protective layer already in them. This way, when the top coat dries, it’ll have extra protection against everyday wear and tear on your furniture.
- Use a stain that has the same color as your wood. When you’re working with darker woods like red oak or walnut, be sure not to go overboard with dark stains because they can make small imperfections stand out more than they would if you were using lighter colors such as light browns or white shades instead!
- Use a stain with a built-in conditioner. If there are any cracks in the finish of your wooden furniture items (especially if they’re antique pieces), then this could lead them into becoming damaged even further after being treated by regular cleaners like Windex glass cleaner products which contain ammonia compounds that dry out whatever surface they come into contact with over time.”
Is wood filler necessary?
Wood filler can be used to fill in small chips and cracks. It can also be used to fill in large chips and cracks, but it’s a temporary fix at best.
Since wood filler does not bind to the wood and is composed of an adhesive or glue, it will not hold moisture or repair like a traditional stain would.
However, if you have a small chip on your cabinet or door that you want to simply fill in with a dab of glue (rather than refinish) then yes, use the wood filler first before applying your stain because once this is done all you need is sandpaper or steel wool (if necessary) and then finish off with some fresh coats of paint!
How long should wood filler dry before sanding?
After you apply the wood filler, it will take at least 24 hours for it to dry. The amount of time it takes depends on the brand that you’re using and the humidity in your area.
For example, some wood fillers can dry in just 30 minutes if they’re applied during a humid summer day.
The best way to tell if your wood filler is dry is by touching the surface of your project with your finger; if it feels hard and rough (like sandpaper), then it’s likely ready for sanding.
If it feels soft like clay or doughy like Play-Doh, then give your project another hour or so before checking again with touch alone because moisture could still be trapped underneath the dried layer of filler.
Conclusion
With that, we hope you’re now equipped with all the information you need to make your wood filler decisions.
As always, it’s best to follow the manufacturer’s instructions, but if they aren’t available or specific enough then this article should give you some guidance.
We’d love to hear how it goes and if there are any other questions that need answering!
Martin Flood
Martin Flood has been working in the construction industry for over 20 years as a general contractor with expertise in remodeling projects that are large or small. He has furthered his career by specializing in epoxy resin flooring, providing excellent service to both commercial and residential clients. Martin’s experience enables him to offer professional advice on how to choose the right type of project based on your needs and budget.
View all posts by Martin Flood →