
When you’re working on a project, it’s always good to know what your options are. For example, if your subfloor is damaged and needs to be replaced, can you just replace the section that’s damaged?
Or do you need to replace the entire subfloor? This article will answer these questions and more so that you have all the information you need for your next project.
What to use to fill holes in subfloor?
Use a wood filler that is designed for subfloors. Some fillers are better than others and, depending on the type of filler you use, it can be more or less difficult to get rid of.
When choosing a wood filler, look for one that’s specifically made for subfloors.
A good choice would be something like Minwax Polycrylic Water Based Wood Filler (about $20) or Gorilla Glue All Purpose Wood Filler ($25).
The thing to watch out for here is making sure that whichever product you choose will match your existing subfloor as closely as possible.
If there are colors in your flooring already then choose one with those same colors; if not then opt for something neutral like white so that it blends into the floor without being too noticeable when you’re done sanding down the edges and applying polyurethane/sealer/whatever else is called for by your particular brand of polyurethane sealant (which usually comes in either a satin finish or semi-gloss).
Table of Contents
How do you fix a chipped subfloor?
Chipped subfloors are one of the most common issues you’ll run into when repairing or remodeling a home.
The best way to fix a chipped subfloor is by using wood filler and letting it dry before sanding it smooth and finishing with a stain or paint.
Here’s how:
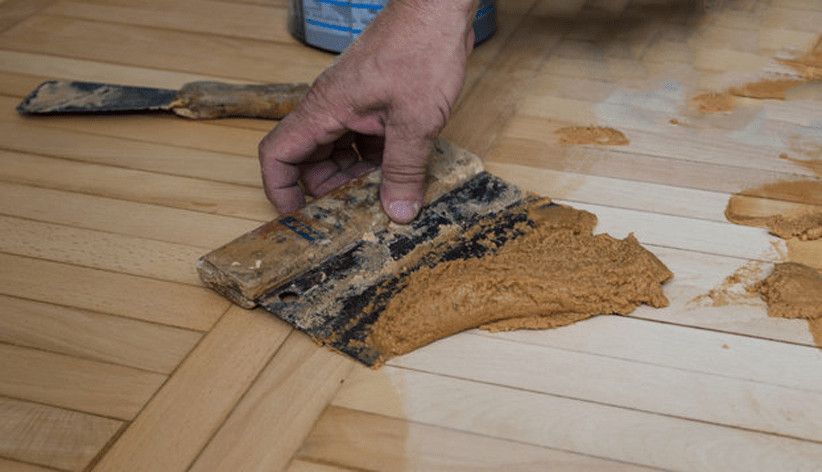
- Use your putty knife to scoop out some wood filler, then spread it over the damaged area on your subfloor as thinly as possible (it should be about as thick as peanut butter). If you have an existing finish on your floor, like paint or laminate, try not to get any of the wood filler on top of this.
- Let the wood filler dry for 24 hours before sanding it down with 120 grit sandpaper until smooth; do this from both sides so there aren’t any visible gaps between boards where moisture can collect underneath them! Once all of your repairs have been made and dried completely (24 hours), apply another coat overtop if necessary—this will help waterproof everything else underneath too because there won’t be any voids left behind now thanks to all those little holes being filled up completely with a good amount of pressure instead!”
How do you fix cracks in wood subfloor?
- Use a wood filler compatible with the wood you are using.
- Apply the filler in thin layers, allowing it to dry before applying the next layer, until your crack is filled completely.
How do you seal a subfloor joint?
You can use wood filler on your subfloor joints, but you will need to seal them afterward. You should apply a sealant that is compatible with the type of subfloor you are using and follow these steps:
- Use a caulking gun to apply the sealant. Apply it along the edge of the joint between two planks of wood until it is completely filled.
- Let the sealant dry for 24 hours before walking on it, even if this occurs over winter months when it remains cold outside for extended periods of time.
Should you fill gaps in subfloor?
Yes, you can fill gaps in subfloor. You’ll have to use a gap filler that is compatible with the subfloor and its finish.
This means selecting a gap filler that has the same moisture content as your existing flooring and adhesives used for attaching it to the subfloor.
If you do not know what adhesive was used, choose a gap filler that is compatible with polyurethane or polyethylene (PE).
How do you fill a low spot subfloor?
- To fill a low spot, remove the damaged piece of subfloor. A hammer works well for this purpose.
- Use a saw to cut out and remove the new piece from the sheet of subflooring. You can use either a hand saw or electric jigsaw, depending on how large your patch area is and how much time you have on your hands.
- Nail in place with an 18-gauge nail gun or hammer and finish off by driving each nail all the way into place with an impact driver or hammer (again).
How do you fix water damaged subfloor?
Water-damaged subfloor is a common problem, especially in basements where flooding is a constant threat.
You’ll need to remove all of the water-damaged wood and insulation before you start repairing the subfloor.
If you’re working on a single-family home with your own tools, begin by cutting away all of the drywall around where water damage occurred.
Make sure that you have enough extra room for patching later on when it comes time to repair both drywall and flooring (if necessary).
If there’s any mold or mildew growth present along with wetness in this area, use bleach paste and an N95 mask before continuing with removing the damaged materials from below—otherwise, leave these surfaces alone until they’ve dried out completely.
Once everything else has been removed from below, use a sander or paintbrush to clean off any remaining dust or grime before moving forward with repairs.
Can you replace a small section of subfloor?
You can replace small sections of flooring, but it’s not easy. The best way to go about it depends on your budget and the type of subfloor you have.
- Check with a contractor before replacing any section of the floor. It may be cheaper to replace the entire floor instead of just one small section.
- If you’re going to replace only one area, it’s often better to do a full replacement rather than patching over an existing area that has already been damaged. This ensures that there aren’t any hidden problems lurking beneath your feet as well as allows you more control over how the new subfloor is laid out (e.g., installing tile in an area where it wasn’t previously installed).
- In some cases, you can save time by simply replacing a damaged section rather than having to repaint or refinish an entire room after removing carpeting or linoleum tiles from around edges.”
Conclusion
In summary, there are several ways to fix subflooring. The most important thing is that you decide on the best method and get it done right.
Make sure you use quality materials and take all the necessary safety precautions.
Martin Flood
Martin Flood has been working in the construction industry for over 20 years as a general contractor with expertise in remodeling projects that are large or small. He has furthered his career by specializing in epoxy resin flooring, providing excellent service to both commercial and residential clients. Martin’s experience enables him to offer professional advice on how to choose the right type of project based on your needs and budget.
View all posts by Martin Flood →