

Accurate measurements are the backbone of any successful DIY project, especially when working with resin. Understanding the intricacies of resin measurements is crucial to achieving a professional-looking outcome. This blog post is designed to provide a comprehensive, step-by-step guide to calculating measurements for resin DIY enthusiasts. From the types of resin to the tools needed for precise measurements, we’ll cover it all.
Understanding the Basics of Resin Measurements
Before we dive into calculating measurements, it’s essential to understand the basics of resin and how it is measured.
Table of Contents
Types of Resin
There are three main types of resin used in DIY projects:
- Epoxy resin: Widely popular for its versatility and low odor, epoxy resin is typically used for casting, coating, and adhesive applications.
- Polyester resin: Known for its affordability and fast curing times, polyester resin is commonly used for fiberglass projects and large castings.
- Polyurethane resin: Valued for its high durability and impact resistance, polyurethane resin is ideal for casting rigid or flexible objects.
Resin Volume vs. Weight
When measuring resin, it’s crucial to understand the difference between volume and weight measurements:
- The importance of understanding the difference: Using the wrong measurement type can lead to an incorrect resin-to-hardener ratio, resulting in improper curing and a compromised final product.
- When to use volume measurements: Epoxy resins typically require volume measurements, as the components are often mixed in a 1:1 ratio.
- When to use weight measurements: Polyester and polyurethane resins are generally measured by weight, as the ratios are often not equal.
Tools and Equipment for Accurate Measurements
To ensure precise measurements, having the right tools and equipment on hand is essential.
Basic Measurement Tools
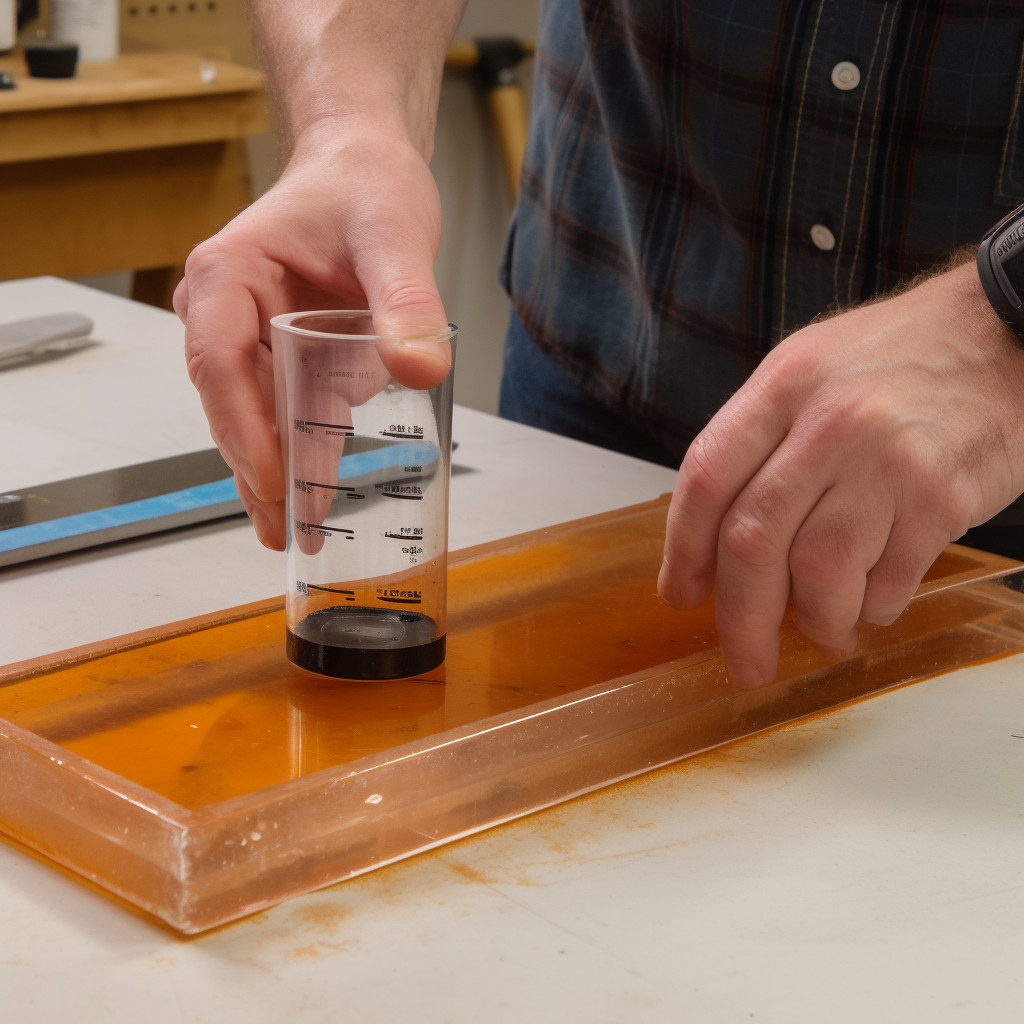
- Measuring cups: Ideal for measuring larger volumes of resin and hardener, measuring cups should have clear markings to ensure accuracy.
- Digital scales: Essential for measuring by weight, digital scales offer precision and ease of use. Choose a scale with a tare function to account for the container’s weight.
- Graduated cylinders: Perfect for measuring smaller volumes of liquid, graduated cylinders have clear, precise markings along their sides.
- Pipettes and droppers: Ideal for measuring minute amounts of resin or additives, these tools provide control and accuracy.
Advanced Measurement Equipment
- Micrometers: Used to measure the thickness of materials or coatings, micrometers provide extreme precision, often down to 0.001 inches.
- Calipers: Useful for measuring the dimensions of objects or molds, calipers come in both digital and manual varieties.
- Laser distance measurers: Ideal for calculating the surface area of large projects, these devices provide quick and accurate distance measurements.
Calculating Resin Measurements for Common DIY Projects
Now that we understand the basics and have the right tools, let’s explore how to calculate measurements for various resin DIY projects.
Resin Coatings
- Estimating the surface area: To calculate the required amount of resin, first, determine the surface area of your project in square inches or square feet. Use a measuring tape, ruler, or a laser distance measurer for larger surfaces.
- Determining the required thickness: Next, decide on the desired thickness of the resin coating. Epoxy coatings typically range from 1/16 to 1/8 inch. To convert inches to feet, use this inches-to-feet converter.
- Calculating the volume of resin needed: Multiply the surface area by the desired thickness to determine the volume of resin required. Remember to use the appropriate measurement type (volume or weight) for the resin you’re working with.
Resin Molds and Casting
- Understanding the mold volume: Measure the dimensions of your mold (length, width, and depth) and multiply them to find the volume. If your mold has an irregular shape, break it down into smaller, regular shapes and calculate their volumes separately, then add them together.
- Factoring in shrinkage: Resin, especially polyurethane, and polyester, can shrink during curing. To account for this, increase the calculated volume by 2-5%, depending on the resin type and manufacturer’s recommendations.
- Calculating the weight of resin needed: Convert the final volume to weight using the resin’s specific gravity (provided by the manufacturer). Remember to include the hardener or catalyst in your calculations, as these components also contribute to the overall weight.
Embedding Objects in Resin
- Accounting for the object’s volume: When embedding objects in resin, first calculate the object’s volume. For irregularly shaped objects, consider using the displacement method: submerge the object in the water and measure the volume of water displaced.
- Calculating the remaining resin volume: Subtract the object’s volume from the mold’s volume to find the remaining volume needed for the resin. Make sure to account for any additional embedded objects.
- Ensuring proper curing and even distribution: When embedding objects in resin, it’s crucial to follow the manufacturer’s instructions for proper curing. Pour the resin in layers, allowing each layer to partially cure before adding the next to prevent the object from sinking or floating.
Tips and Tricks for Perfect Resin Measurements
Avoiding Common Mistakes
- Over- or under-measuring resin components: Always double-check your measurements before mixing resin and hardener. Inaccurate measurements can lead to improper curing or other issues with your project.
- Failing to properly mix resin and hardener: Mix resin and hardener thoroughly, following the manufacturer’s instructions. Poorly mixed components can result in a tacky or uneven finish.
- Using incorrect measuring tools: Always use the appropriate measuring tools for your project. Using the wrong tool can lead to inaccurate measurements and a compromised final result.
Ensuring Consistent Results
- Developing a system for organizing measurements: Keep track of your measurements and calculations in a notebook or spreadsheet. This will help you stay organized and ensure consistent results across multiple projects.
- Double-checking calculations: Always double-check your calculations before proceeding with your project. Mistakes are easy to make, and catching them early can save time and materials.
- Maintaining a clean and organized workspace: Keep your workspace clean and organized to minimize the risk of contamination or mistakes. Store measuring tools and materials properly to ensure their longevity and accuracy.
Conclusion
Accurate measurements are crucial for successful resin DIY projects. By understanding the different types of resin, using the appropriate tools, and following the best practices outlined in this guide, you can achieve professional-looking results in your DIY resin projects. Remember to experiment, learn from your mistakes, and always strive for improvement.
As you continue on your resin DIY journey, don’t hesitate to consult additional resources for further learning. Check out some high-trust DIY websites like Instructables and Make: for more tutorials and project ideas. Moreover, consider joining online forums and communities to connect with fellow DIY enthusiasts, share your experiences, and learn from others.
By mastering the art of calculating measurements for your resin projects, you’ll be well on your way to creating unique, high-quality pieces that showcase your creativity and skill. Happy crafting!
Sources
- Instructables: A comprehensive library of user-generated DIY tutorials, including many resin-based projects.
- Make:: An online and print magazine devoted to DIY projects, technology, and creativity, featuring a variety of resin projects and guides.
- Smooth-On: A leading manufacturer of resin products, offering a wealth of tutorials and technical information on their website.
- ArtResin: A popular epoxy resin brand with an extensive library of tutorials, tips, and project ideas on its website.
FAQ
How do I know if I should measure my resin by volume or weight?
The type of measurement you should use depends on the resin you’re working with. Typically, epoxy resins require volume measurements, while polyester and polyurethane resins require weight measurements. Always follow the manufacturer’s instructions to ensure accurate measurements and proper curing.
What should I do if I accidentally over-measure or under-measure my resin components?
If you discover a mistake in your measurements, it’s best to start over with the correct amounts to avoid problems with curing or the final result. Keep in mind that improperly mixed resin can lead to a tacky or uneven finish.
Why is my resin not curing properly?
There could be several reasons for improper curing, including incorrect measurements, poor mixing, contamination, or using expired resin or hardener. Always double-check your measurements, mix the components thoroughly, keep your workspace clean, and use fresh materials to ensure proper curing.
Can I use kitchen measuring tools for measuring resin?
While it’s possible to use kitchen measuring tools for resin projects, investing in dedicated tools for resin work is best. This will prevent contamination and ensure the longevity and accuracy of your measuring tools.
How do I prevent bubbles in my resin projects?
To minimize bubbles, pour the resin slowly and carefully, and use a heat gun or torch to gently pop any bubbles that form on the surface. Additionally, be sure to mix the resin and hardener slowly and thoroughly to avoid introducing excess air.
Martin Flood
Martin Flood has been working in the construction industry for over 20 years as a general contractor with expertise in remodeling projects that are large or small. He has furthered his career by specializing in epoxy resin flooring, providing excellent service to both commercial and residential clients. Martin’s experience enables him to offer professional advice on how to choose the right type of project based on your needs and budget.
View all posts by Martin Flood →